Archive for the ‘Uncategorized’ Category

I know I usually give these messages retroactively, but I thought I might change things up a bit and let you know that I will be taking a small break from the FrankenJeep build… before too much time goes by and I realize I forgot to write anything here. Okay, I understand that you may have already clued in on the fact that it has already been some time since I was actually working on this project… alright, it has been four months since I have been in the garage. It is not for lack of want but, contrarily, I have failed to get into the garage and work on the little truck due to having… now this is embarrassing, too many projects.

WHAAAAT?!? Too many projects? You?!?

Ha. Ha. Yuck it up. I know. I am still working on this truck; I am just trying to get these other things in order first. The old job situation threw a wrench in all of this, and then I was gaining so much ground in the J20 build, then the new job situation… Anyhow, both the FrankenJeep and the J20 will be on a slight hiatus while I get the shop worked out, we are moving shops and are in the process of reallocating the importance of all builds in progress.

Whether it makes any sense to you or not, I will be working on my 2006 Grand Prix next.

WAIT… WHAT??? When did you get a Pontiac?

I told you about it earlier; I did! During the Quarter Panel Quandary, I specifically mentioned my “inability to focus on a single project … the Grand Prix … etc…” Does any of that ring a bell?

Okay. Okay. In the beginning of spring I was trying to fix the Camry and juggle cars between the drivers of the house. I figured there had to be a better way, and I went looking for a vehicle on the cheap. The wife had her Jetta, the teenager’s Camry was obviously out of commission as it needed head work, and although the Regal worked, it was showing signs of wear. The three of us needed a full time vehicle, but there were only two available. I picked up a sweet Crown Victoria ex-cop car [if only there was a facetious font]… that is, it was a sweet ride until I actually needed to depend on it. I drove it over the long weekend and decided it was going to be my daily driver. I paid for it and the next day it threw a check engine light; I found out that cylinders 2, 4, & 6 had low compression. It turned out they had put in some oil additive to temporarily fix the problem… just long enough for some sucker to come along and buy it.

Screenshot_20170507-131336

Alright, perhaps I deserve that one. Anyhow, I spoke with them and told them the situation – basically, I needed a car that worked and was reliable. Having half an engine was not “reliable” enough for me. I have played that game too many times. We came to an agreement and the Crown Vic went back to them, and instead, I got a Ford Explorer for the teenager to drive. So far, he is stoked with his new truck. Awesome.

That still did not account for my Regal that was tired of driving. Cylinder #4 has low compression on the Buick, and I do not want to open up the engine to find out it is a problem I need to rebuild; then I am out of a car. Right now the vehicle drives and gets me from point A to B. Sometimes it even gets me back. There are a whole mess of little tiny problems with the Regal that do not affect the drivability of the car but are very annoying, nonetheless.

  • Rear windows do not roll down
  • Front windows roll down, but the passenger’s side does not always roll up
  • The VATS (Vehicle Anti-Theft Security) system is on the fritz and it will keep the car from starting for three minutes at a time… whenever it feels like it
  • The car alarm has taken to going off whenever it wants (even though I never lock the car)
  • The A/C will not turn off… unless I have a passenger, then they have to kick the dashboard bottom to get it to turn on
  • The Daylight Running Lights do what they want… sometimes they will both come on, other times only one will
  • The CD player and tape deck are broken, I only have AM/FM radio… this is not a problem until I am driving anywhere east of Globe, AZ
  • I cannot get into the trunk… the fob is broken and the key will not work
  • The windshield washer fluid reservoir will not hold washer fluid

I am sure you get the point. None of these make the car inoperable, and it would probably only take me about $150 or so and a solid weekend to fix all of it… but at the end of the day, I am still in a 1997 Regal.

If you hate the car so much, why did you buy it in the first place?

Well, I did not exactly buy a 1997 Buick Regal. I would not have any interest in that. However, the supercharged 3.8L V6 inside of that car, I do have interest in. So, I bought a supercharged engine and got a running car with it.

What did you do next?

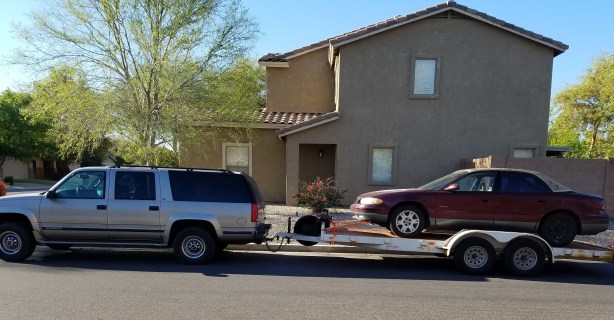
I saved my dollars and bought a Suburban.

20170316_081832

…you can see why I had no interest in fixing anything on the Regal other than what was required to keep it running for the last year or so.

Why did you buy a Suburban?

Good question! If you read the J20 Build, you will know that a Suburban and my Jeep truck share the same wheelbase… and if you know your Suburbans, you know that I bought the wrong one.

Well, that is not entirely accurate. This is a ¾ ton 4×4 Suburban with a 454ci engine. All of that is perfect for a diesel conversion. What is not perfect, for my application, is Independent Front Suspension. IFS is worthless to me and I need a solid front axle. No worries though, I happen to know a guy that could make very good use out of this truck, and he has just the parts I need. So we trade, but all of that is in the J20 stories. You are wondering when I will circle back to the Grand Prix.

Just a recap – the Camry was down and to replace it, I bought a Crown Vic and then traded it for an Explorer. To get my J20 running, I bought a Suburban and traded it for an older Suburban; and I bought a Grand Prix to replace the Regal.

Yeah, yeah. Whatever! Let’s see this new car!!

Screenshot_20170413-221225

This is my 2006 Pontiac Grand Prix. I bought it from a guy off the Craigslist and it turned out to be exactly what he said it was. He had a clean, well maintained 3.8L V6… with a broken transmission.

I KNEW IT!!! YOU CANNOT HELP YOURSELF, CAN YOU?!?

Perhaps you are right, but this has so far turned out to be an excellent deal…

Wait a minute! You said Grand Prix “PROJECT”… you are not planning on…

Supercharging the Grand Prix? That is already in the works. I will give this build its own mini write-up and you can see how that progress goes over there.

. . .

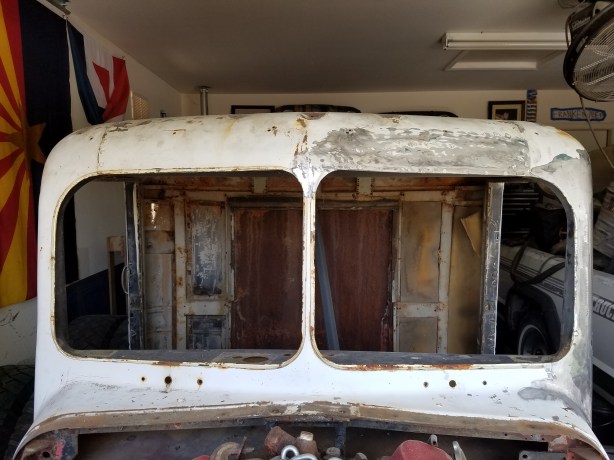
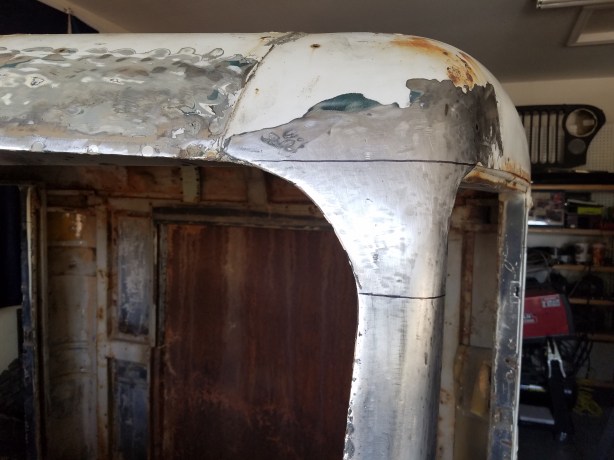
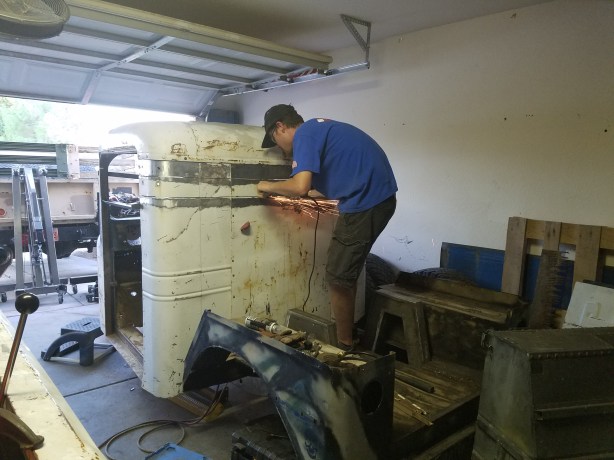
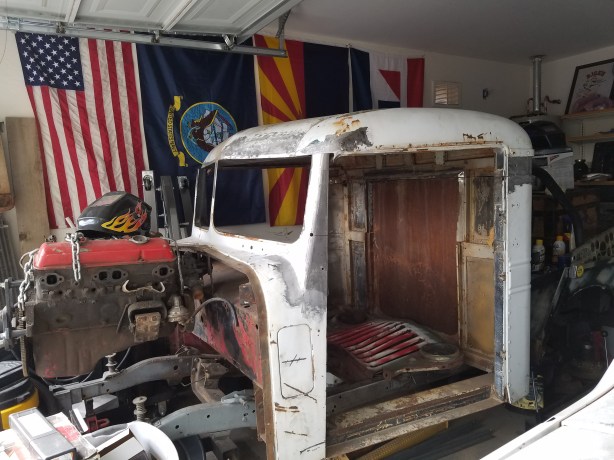
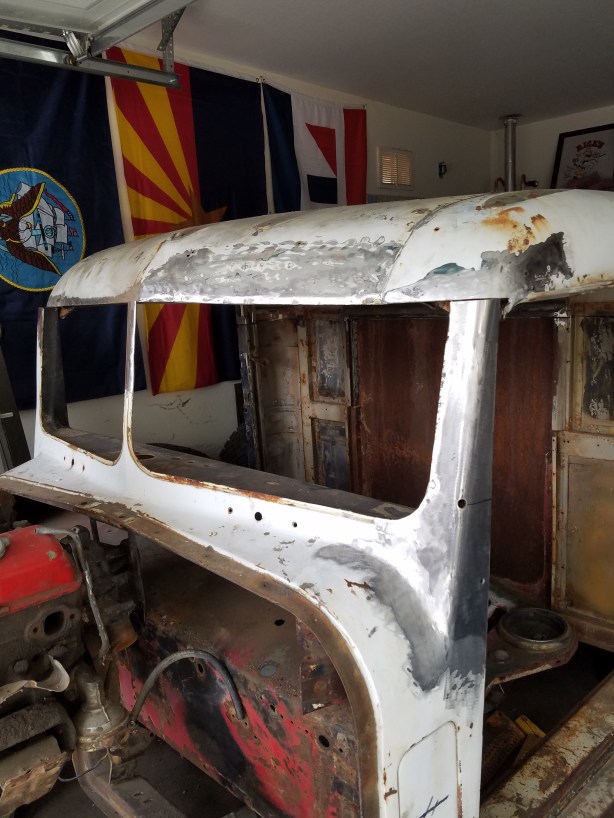
Do not worry, I will not allow this FrankenJeep build to be abandoned; there is far too much insanity to leave blank pages. My boss, Jack, provided the engine and drivetrain for the little hot rod; he is itching to hear it roar again. He is helping me with the logistics and the fabrication involved in creating such a unique beast, but he also has his own projects, and everything will get done in due time. Once we are settled in our new shop and we have gotten the chance to catch up with our work load, we will be working on these things like mad men.

Right before I told you the story of the Quarter Panel Quandary, I teased you with “the Story You Have All Been Waiting For”. I understand that seven months is far too long to go without telling the story of this build.

What is going on? Are you still building it? Are you even still alive?

These are some questions you may have asked while I was out. Here are the answers, in reverse order.

YES, I am still alive. YES, I am still building the FrankenJeep. As far as “What is going on?” Well…

Screenshot_20170507-124430

Alright, I will try and keep to the point and give you a fair, yet concise, representation of the past half year in words.

Between October 11, 2016 and January 27, 2017 there were the normal activities in the garage. Tony would come over on the weekends that I was home and help me work on the FrankenJeep. Sometimes we would get lots of things accomplished, while other times… not so much; you should know by now the way things work with this project. We did get the quarter panels replaced in November, and for the most part, they look really good. In December, I got some more parts from Jerry. I got the Dana 44 front axle, and some other miscellaneous parts from him. We also got the idea to change up the rear bedsides (I will go more into this later, as I still have work to do before we get them dialed in); here are some prototype pictures of that endeavor.

In January, I took the family and met with some members of Rat Rod Addiction for a luncheon.

Screenshot_20170507-131336

The meal was good and the company was fantastic! I spoke with some guys and we swapped ideas, it was a good day in all.

That brings you up to date until the end of January, which is when things took an interesting turn. You see, I was sort of stuck in the FrankenJeep build; I still did not have a reliable truck, the engine plans for the build fell through when I found out the depth of rebuild needed to make the SBC 400 work, I only had my front axle as the axle I got for the back was only a 10 bolt rear end, and I was losing steam on all of the grinding that was still needed to finish the frame. I just did not want to do any more grinding for a while.

What does one do in such a situation? I am not sure, but I went looking for a second job and found refuge in a custom body shop by the name of Sick Customs. Jack Reigelsperger is my boss and he is a bad ass.

20170422_110355

No, I did not receive a bonus for plugging his name. This guy is just pure awesome on so many levels.

  1. Just look at his builds. Quality in everything he does
  2. Realize he is only in his mid 30’s
  3. He has graced the pages of many hot rod and custom car magazines
  4. He holds the patent to a fourth generation (1961-69) Lincoln Continental 4-link and air bag system
  5. He hired me on as a body tech and has taken very good care of me, teaching me the ways of custom car building

Most importantly, he cut me a killer deal on some very much needed parts for my builds.

I answered an ad on the FaceBox for someone looking for help at a custom auto shop. I contacted Jack and met with him on a Friday, I was working for him the next Monday. During our few times of lull, we would speak of the different projects we had and I told him of this one, the FrankenJeep build. He explained to me that he had the perfect drivetrain for the build, as well as a host of other goodies I needed for my other project, and that he was willing to make me a package deal. We talked logistics and came to an agreement, a deal was made.

I got a Chevy 350 (pushing almost 400hp) with a Muncie 4 speed transmission and an NP-205 transfer case; I also got a 14 bolt rearend with disc brakes, and that took care of the needed parts for this build.

The problem (depending on who you are, and how you look at it) came with the “other project” parts. You see, I was at the shop working my magic on a flip truck when I got a crazy idea to check the wheelbase of the square body Suburban sitting in the yard. It turns out that the Suburban is 131.5” long between the centers of the wheels. My J20, Hyde, has a wheelbase of 131”. This Suburban was already converted to house a 12v Cummins in it and seemed to be the perfect candidate for a body swap. It was also set up with a disc brake 14 bolt rearend and was loaded with other goodies like leather seats, executive styled center consoles, and a Grant GT Premium wooden steering wheel.

Now, do you see my problem? I practically have a turnkey body swap project to create my dream of a 12v Cummins powered Jeep J20. Oh, did I mention this diesel had not just a single, but twin turbos? Yep, we are looking at 600hp and 1400ftlbs of torque when this thing is up and running. I have been spending my weekends getting it ready for the Power Tour, in June.

…And that brings you up to the current date.

(Oh yeah, and the oilfield permanently laid me off in February, the day before I was going to go back to work.)

Head on over to check out my other build site to find out what is going on over there with the Jekyll and Hyde truck.


When I found out my quarters were pot metal, I was pretty upset, I wanted to have a clean chop. The cut was clean, but seeing as I did not have a TIG welder, I could not have the clean look I was after, meaning I could not weld the seam. I  tried to cover it with a Weld Stik, which is like a putty compound that is supposedly able to work as a weld adhesive.

20161108_165833

That did not really work well, so I tried to paint over it with Flex Seal. I had really good luck with the Flex Seal when I used it on the J20 dash. This time was much different, I found out that stuff does not work very well when it is used vertically as it likes to drip. Actually it ran as fast as I laid it down, it was like trying to paint with ice cream… in the summer. It did not work well at all.

Switching gears – instead of trying to fix it, just replace it. Sounds good, right? Right. That is exactly what I did, I took the 16 gauge steel I had lying around the garage and made quarter panels from it. The first one was a total disaster. I lined up the edge, drilled my holes and then riveted each one by hand with a ¼” rivet. I proceeded to make my bend around the corner and quickly realized the metal was not bending cleanly as I wanted it to, but it was instead creasing.

20161115_201730

Not good. Not good at all. I decided that maybe this was a two man job, so I briefed Tony the next weekend and we set to create a quarter panel.

Of course, during this build, I have made it a point to try and work with something while only using half of the tools needed for the job. Haha. At least that is the way it seems. Just remember that I am but a man with an idea, trying to seek project fruition in a 200 square foot garage that happens to be located in a Home Owners Association and I am on a limited budget. [Okay, full disclosure – the “limited” budget is widely due to my inability to focus on a single project. I have this one, the J20 build (which is another reason I have not written here lately), the Camry engine overhaul, the Grand Prix project, the Baja Comanche project, etc… etc… etc…]

THE QUARTER PANELS?!?

Yes, the quarter panels. Sorry. So I have this 16ga steel in the garage that used to be shelves. It is not the best steel I have come across, but it is readily available to me, so I made measurements, checked them, second checked them and laid out templates on the sheet. Then I cut the panel out and drilled my first hole. I measured out all of my holes and drilled them, installing ¼” rivets into each hole via manual rivet gun. As I was making my way around the corner, it started creasing and that is when I got Tony involved. I figured we needed to heat up the metal and make it more pliable so it will bend better. The proper tool for this is NOT a propane torch. Then, once the metal is hot enough, you want to have a dolly to strike against and move the metal. A proper dolly is NOT made from a broken adjustable wrench and a 3”x3” square piece of ⅛” thick steel. And you want to use a hefty hammer for striking your dolly to move the metal where you want it. The proper hammer is NOT an Estwing claw hammer.

Do you see what I am working with here?

Anyhow, Tony and I went to heating and striking. Heating and Striking. Heating and … Oh no, the metal is on fire! Nope, false alarm. Only the paint was on fire. Heating and striking. Drilling and pop riveting. Drilling and pop riveting. Heating and strik… um, why do we have a bend in the middle of the metal going perpendicular to our projected shape? Ah crap! Okay… Now what? Relief cut! We will just use the cutting wheel to make a cut across the metal and the side should lay down like it is supposed to. I got my welder back up and running, ran a few beads across the relief cut and thought it was ugly, but functional. Whew!! That was quite the ordeal!

20161119_201617

[I ended up going to work and coming back before we did the other side.]

This time, we knew what had to happen. We measured, checked, checked again, laid it out and cut it from the sheet stock. We drilled the first hole, hand riveted the ¼” rivet and measured down to do it again. We got the inside line of rivets set and got prepared for the circus we knew that was about to commence. We measured, marked and drilled out, hand riveted and did it again. And again. And again. We did the bottom side the same way. Wait. What?? No heating and striking? Nope. This one laid out just perfectly, all the way to the end. So much that I almost ripped off the first one to do it again.

. . . Right after a word from our sponsors . . .

Haha! I always hated when they did that, but such is the way they sell entertainment, right?

To the point of the matter. Mac, where have you been, and what has been going on? Am I correct, these are the questions you all want the answers to? Here we go, much has gone on since October 11, 2016.

Hmm, where to start… obviously with the FrankenJeep, and more than likely right where we left off, right? Okay, I last told you the crazy story of how I met Mike Johnson and bought the Willys grille. If you remember correctly, I bought a Willys grille from a man that was there during the building of the very Jeep that gave me the idea to create the FrankenJeep and take it in its current direction. Yeah, so?!?

I also previously let you in on the little tidbit of information that my quarter panels were made of pot metal and that I needed to do something about it. Well, I did. That is right, I finally got the quarter panel situation [sort of] figured out.

I have told you in the past that even if I am not actively working on the FrankenJeep, I am almost always working on the FrankenJeep. When I am at sea, I have time on my hands. This is what often becomes of it…

Gather ‘round because it is story time! This is a story of a little grille in a small world.

There was once a Jeep build by the name of FrankenJeep. Many of the parts were already had, but there were still a few that needed to be gotten before we could start to see the machine take form. A big piece that was missing was the grille. Yes, there was the one from its previous life, but that would not suit the needs of this little Jeep, for he needed something with a point to it, unlike the long beginning of this story…

Get on with it, will you?!

Okay, okay… if you remember, I gave you that spoiler alert and told you there would be a plot twist; there was a mock up picture of the FrankenJeep that I put up.

20160814_153244

Actually, let us go back even further, back to the beginning. Remember when I told you my initial plans for the Jeep; the ones that abandoned making a right hand drive CJ5 clone, and instead turning it into a flat rod? I showed you some pictures of two similar, yet very different flat rod builds – the red Jeep made in Texas, and the green Jeep made in Arizona.

IMG_0603

If you remember correctly, I explained to you that this O.D. Green Army Jeep gave me a lot of ideas, and it was that very Jeep that made up my mind to go the way of the flat rod. At the time, I failed to tell you the name of the builder. It was Randy Ellis; his shop, Randy Ellis Designs (R.E.D. Inc.), in Phoenix built the Army themed flat rod you saw on these pages and many other pages around the internet. Now, I did not maliciously try to discredit Mr. Ellis, or even purposefully fail to give him credit, I was just not as diligent back then about ensuring that I shelled out the names of strangers just because they gave me an idea.

That’s nice. To the story already!

So, to the point; the grille I showed you in the mock photo? I found it on Craigslist.

20160718_2259091

That’s it. That is the story of the grille; I bought it off a guy on Craigslist.

WHAT??!!! That is your epic story?!!


Haha! No, that is not the entire story. Yes, I did buy it off a guy on Craigslist. In fact, I drove more than 120 miles, round trip, to get that grille. But not even that is the best part of the story.

I drove all the out to West Glendale, about 65 miles away, to get that grille from a guy named Mike Johnson. (You see Mike? I told you your time would come!) I could tell pretty quickly that Mike was a like-minded gearhead, and that he would probably have some good stories to tell me. Boy was I in for a surprise.

Mike got me talking about the Jeeps and the different ideas that I had. Then he led me on a little journey to the side of the house and he opened up his back gate to show me a Jeep he had built when he was just thirteen. He had kept it, and kept it running for over forty years! In its own right, the Jeep was a rat rod. You all know I hate the term, but it was built in the truest form of the word. Mike used whatever he could source to make it work, even using scrap steel to fabricate parts!

After I saw that, I knew we were akin of twisted minds, so I started giving him better information about the FrankenJeep build, showing him pictures and explaining what I started with, what I had already done, and what my plans were for it. I went in to detail about the build and asked him if he knew about Randy Ellis and the Army flat rod.

“Yeah, I know Randy. I was with him when he built that.”


keanu

It turned out that I drove 65 miles to buy a Jeep grille from a guy… to use in a build in which I got the idea from a similar Jeep… that this very guy helped build.

…literally. As it turns out, my quarter panels are made of pot metal. For those of you that may not know why this is such a big deal – pot metal is the left over non-ferrous metal that was thrown into one pot and melted down into a single molten liquid that was easier and cheaper to cast. Again, why is that such a big deal? It is most often lacking iron, meaning I cannot weld it. Okay, I cannot easily weld it with the tools that I have. Pot metal has a lower melting point than a more pure iron, therefore it just blows away when I try and heat it to glue metal together with.

So Mac, “What are you going to do now that you cannot weld your top on?”

Ah, I said my quarter panels were pot metal. The structural framing (i.e. the roof, the A-pillar, the skeletal beams and the firewall) are all steel. They are all capable of being welded. This means that I can make the chop structurally sound, I just need to figure out what to do with the quarter panels. And I think I have an idea for that. Again, I need to make sure I can do it before I say too much more, but I can say this much – it will definitely work with the look of something named FrankenJeep.

You want pictures, don’t you? As I am always one to oblige when I can… for your enjoyment.

Before – A stripped Kenworth cab at stock height.20160822_1104281

You can see here that we have marked out the 4″ we want to cut out.20160827_1555161

The backside has been lined out.20160827_1555101

And the right side A-pillar is ready to go.20160827_1555401

Tony making some cuts. You can see we carefully used a cutting wheel to chop this cab.20160828_1834001

The cutting portion is done, we have cleaned up the lines and positioned the roof.20160930_1524571

You can see the front end did not line up; there will be some fixing to do!20160930_1524411

Probably the best example of how far off it got with only a 4″ chop.20160930_1524331

But, I was able to bring it back…

20161018_132551

and make it look good too!

This is only structural welding, but the chop is sound. This is where it will reside.20160930_2053041

In all, I am extremely happy with the results of my very first chop. I am sure that some people out there would have found it especially painful to watch me perform this surgical magic due to my anal retentiveness, but it was just me and my welder. There was no one there to bother me, and I was able to get out all of the irksome CDO tendencies that drive other people nuts. I worked through them, and I believe the final product paid off.

(“CDO”, for those of you that do not know, is much like “OCD [obsessive compulsive disorder]” except the letters are put in their proper sequence. My obsessive compulsiveness does sometimes get the better of me, but this time I think it worked out on my behalf!)

[Editor’s Note: I must admit that I came back and edited this post as to better convey the story. My apologies to any of you that think I should have gotten it right the first time.]

Just as it states up there, in the title, we were finally able to chop the top on the FrankenJeep!

As you can see, the chop itself went very well.

Sans Tailgate20160828_224916[1]

With Tailgate20160828_225613[1]

(And no, that tailgate was not cut crooked. Due to a mixture of MTV photo angles and the crooked blue sticker striping, it only appears like is was cut wrong.)

Got some more work done on Frank. Not as much as I had anticipated, but we made very good headway, considering we did not get started until almost 14:00.

I really wanted to chop the cab today. I got the electricity fixed and was looking forward to testing it all out. Daniel came over and helped me out with my welder regulator issue, and we went to fire it all up when we found I had no gas.

You see, we were not able to fix the regulator gauge, so we just plugged that port. That happened to be my bottle pressure gauge, so I was unaware that I had no gas in the bottle. Oh well, we did mark out the cuts to perform the 4″ chop, and as soon as I have a welder available again, we are ready to start cutting.

In other parts of the build I did, however, make some forward progress! (Opposed to backward progress? But I digress…)

20160827_191134[1]

I had to notch the wheel wells for the new fuel tank that Luke gave me. He believes it to be a 30 gallon tank; the thing is massive! (50 bonus points to the person that can correctly tell me what that fuel cell came from! [And no, “Luke’s house” is not the answer I am looking for here.]) You can see there is no room back there for the window I had planned, so I made another use of the second DJ-5 barn door I had sitting around the garage.

20160827_204453[1]

I got started on the tailgate for this thing! In order for the tailgate to be finished, I still need to shave the hole leftover from the latch on the barn door, and then cap the top. Those are more things I need a welder for, but it is otherwise coming together nicely. I am still in the process of figuring out if I want it to be a functional tailgate and drop down, or if I am just going to weld it there. Even if it is “functional”, it is still useless as I only have room for batteries and an air tank back there. Nonetheless, I think things are working out pretty well for Ol’ Frank.

The Story of How This All Came to Be

Tony and I had spent the most of the day removing the cab from Hyde and relocating it to my driveway. This was not much of a catastrophe, not enough to write about at least; but we did manage to get it to the ground without anyone, or anything, getting hurt or damaged. We spent the rest of the day looking the cab over and deciding the best route for cutting, and which pieces would fit best where. We could not find the correct angles to cut at, and I was just not happy with the way that this cab was refusing to cooperate with me.

Tony had to leave early and I was sort left by myself for awhile. That is when Bobby called and asked me what I was up to. I told him I was having a hell of a time trying to figure out the best way to cut up this cab to use for pieces, he told me to hang tight and he would be right over.

He drove over in his Cherokee and checked out where I was at in the build; he had yet to see it in real life. He came by and looked it over with me. You see, Bobby had already read my writings here on the interweb and knew my original intentions. That is when he said:

“What if we put that, over there?”

He had pointed to that cab, and motioned to put it over there onto the frame… just as it sat.

BOOM. Mind Blown.

I looked at him and he at me; we both looked at the venerable little Jeep, knowing there would be some metal destruction in order for this to work properly – the front half of the Jeep tub would need to be cut off.

“How much time do you have, Bobby?”

“Why?”

“Because it is almost 21:00 and I am crazy enough to cut this up (in a home owner’s association) right now.”


He asked for, and I supplied him a reciprocating saw. He got to the side of the Jeep, and looked at me once more for the green light, asking if I was positive I was ready to go through with it. You betcha! Cut away my friend!!

20160716_205950[1]

We used the sawzall to cut the verticals, and a cut-off disc to cut all the horizontal metal.

20160716_210924[1]

We cut the tub in half and separated the two piece, sliding the front half off of the frame.

20160716_211814[1]

Then the two of us dragged the cab over to the frame, dropped the frame off the jack stands and on to the ground, and then heaved the heavy cab up onto the frame. We scooted it back toward the rear portion of the tub and checked for clearances as we put the frame back onto the jack stands.

This was the mock up I made that night.