Right before I told you the story of the Quarter Panel Quandary, I teased you with “the Story You Have All Been Waiting For”. I understand that seven months is far too long to go without telling the story of this build.
What is going on? Are you still building it? Are you even still alive?
These are some questions you may have asked while I was out. Here are the answers, in reverse order.
YES, I am still alive. YES, I am still building the FrankenJeep. As far as “What is going on?” Well…
Alright, I will try and keep to the point and give you a fair, yet concise, representation of the past half year in words.
Between October 11, 2016 and January 27, 2017 there were the normal activities in the garage. Tony would come over on the weekends that I was home and help me work on the FrankenJeep. Sometimes we would get lots of things accomplished, while other times… not so much; you should know by now the way things work with this project. We did get the quarter panels replaced in November, and for the most part, they look really good. In December, I got some more parts from Jerry. I got the Dana 44 front axle, and some other miscellaneous parts from him. We also got the idea to change up the rear bedsides (I will go more into this later, as I still have work to do before we get them dialed in); here are some prototype pictures of that endeavor.


In January, I took the family and met with some members of Rat Rod Addiction for a luncheon.
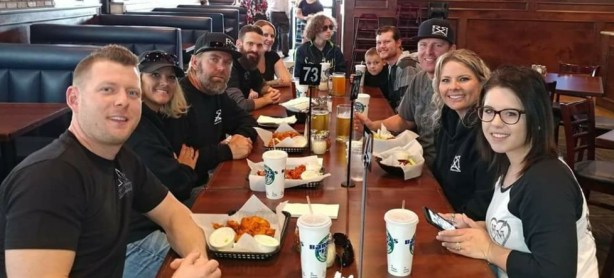
The meal was good and the company was fantastic! I spoke with some guys and we swapped ideas, it was a good day in all.
That brings you up to date until the end of January, which is when things took an interesting turn. You see, I was sort of stuck in the FrankenJeep build; I still did not have a reliable truck, the engine plans for the build fell through when I found out the depth of rebuild needed to make the SBC 400 work, I only had my front axle as the axle I got for the back was only a 10 bolt rear end, and I was losing steam on all of the grinding that was still needed to finish the frame. I just did not want to do any more grinding for a while.
What does one do in such a situation? I am not sure, but I went looking for a second job and found refuge in a custom body shop by the name of Sick Customs. Jack Reigelsperger is my boss and he is a bad ass.

No, I did not receive a bonus for plugging his name. This guy is just pure awesome on so many levels.
- Just look at his builds. Quality in everything he does
- Realize he is only in his mid 30’s
- He has graced the pages of many hot rod and custom car magazines
- He holds the patent to a fourth generation (1961-69) Lincoln Continental 4-link and air bag system
- He hired me on as a body tech and has taken very good care of me, teaching me the ways of custom car building
Most importantly, he cut me a killer deal on some very much needed parts for my builds.
I answered an ad on the FaceBox for someone looking for help at a custom auto shop. I contacted Jack and met with him on a Friday, I was working for him the next Monday. During our few times of lull, we would speak of the different projects we had and I told him of this one, the FrankenJeep build. He explained to me that he had the perfect drivetrain for the build, as well as a host of other goodies I needed for my other project, and that he was willing to make me a package deal. We talked logistics and came to an agreement, a deal was made.
I got a Chevy 350 (pushing almost 400hp) with a Muncie 4 speed transmission and an NP-205 transfer case; I also got a 14 bolt rearend with disc brakes, and that took care of the needed parts for this build.
The problem (depending on who you are, and how you look at it) came with the “other project” parts. You see, I was at the shop working my magic on a flip truck when I got a crazy idea to check the wheelbase of the square body Suburban sitting in the yard. It turns out that the Suburban is 131.5” long between the centers of the wheels. My J20, Hyde, has a wheelbase of 131”. This Suburban was already converted to house a 12v Cummins in it and seemed to be the perfect candidate for a body swap. It was also set up with a disc brake 14 bolt rearend and was loaded with other goodies like leather seats, executive styled center consoles, and a Grant GT Premium wooden steering wheel.
Now, do you see my problem? I practically have a turnkey body swap project to create my dream of a 12v Cummins powered Jeep J20. Oh, did I mention this diesel had not just a single, but twin turbos? Yep, we are looking at 600hp and 1400ftlbs of torque when this thing is up and running. I have been spending my weekends getting it ready for the Power Tour, in June.
…And that brings you up to the current date.
(Oh yeah, and the oilfield permanently laid me off in February, the day before I was going to go back to work.)
Head on over to check out my other build site to find out what is going on over there with the Jekyll and Hyde truck.


