And where have I been spending my time lately? Well, to speak the truth – a lot at work, a little bit at the house, and even less in the garage. If you didn’t know, I work on an oil rig, and I am gone for nearly a month at a time. So it is not like I get paid to work on this thing all day every day. But, that does not mean I have completely shirked my duties in the build. I got something done! Well, sort of… I got something mostly done.
So, I haven’t gotten as far on the build as I wanted to. What is it that I did get accomplished, you may ask?
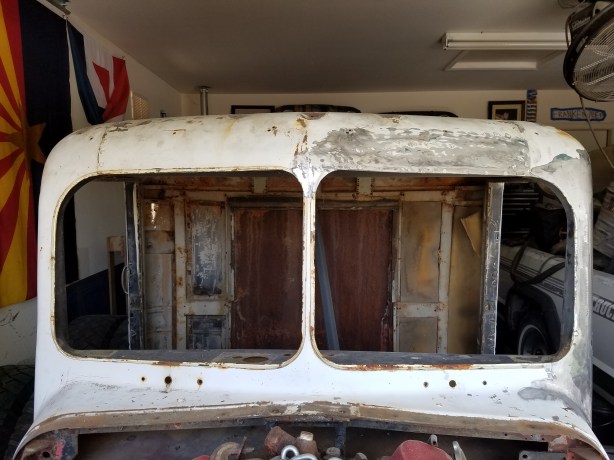
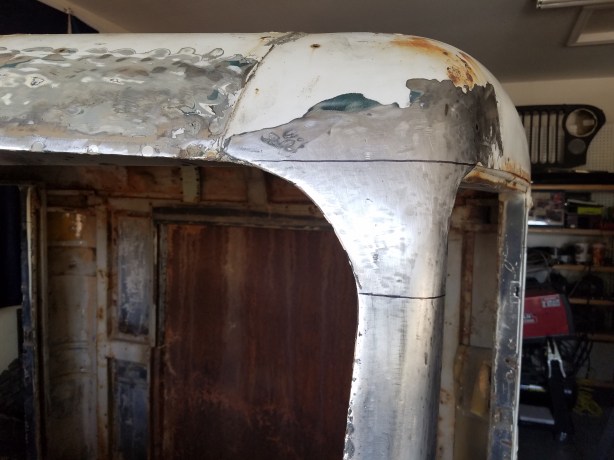
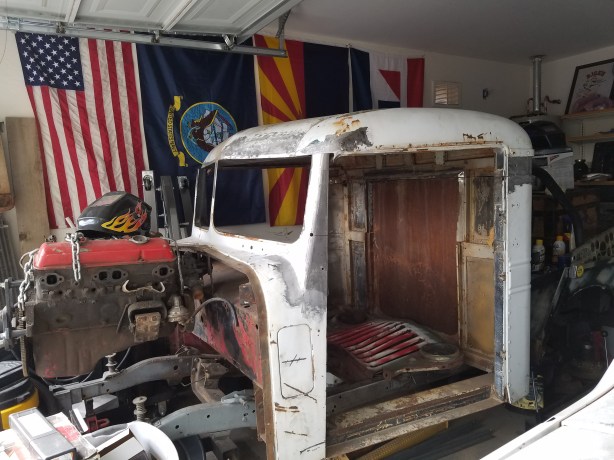
I got most of the frame welded up. Earlier, I showed you my monster C-notches. Well, I got them (mostly) installed, I need to weld three more plates onto it, and I will be good to start work on the suspension. Tony and I had to do a lot of framework, in order to get these things to sit properly.
See?
![IMG_1041[1]](https://azfrankenjeep.com/wp-content/uploads/2014/06/img_10411.jpg?w=224&h=300)
![IMG_1040[1]](https://azfrankenjeep.com/wp-content/uploads/2014/06/img_10401.jpg?w=224&h=300)
![IMG_1039[1]](https://azfrankenjeep.com/wp-content/uploads/2014/06/img_10391.jpg?w=224&h=300)
![IMG_1038[1]](https://azfrankenjeep.com/wp-content/uploads/2014/06/img_10381.jpg?w=224&h=300)
These are not “before and after” pictures, they are left side/right side pictures. There was a crossmember we had to cut out, and there was a lot of boxing in of the frame that needed to be done. But after all that work, we were able to place the notches, and get them ready for final install.
![1402292039147[1]](https://azfrankenjeep.com/wp-content/uploads/2014/06/14022920391471.jpg?w=168&h=300)
![1402292038560[1]](https://azfrankenjeep.com/wp-content/uploads/2014/06/14022920385601.jpg?w=168&h=300)
If you remember correctly, my C-notches came to me as multiple pieces of CNC cut metal – (4) “C” pieces, (4) outer strips, (4) inner strips, (2) uppers and (2) lowers.
The idea behind this is to place the “C” where you want it on the frame, and tack weld it there. Place another “C” in the exact same spot, on the other side of that frame rail, and tack it there. When the placement is good, simply weld it all up, boxing the outer part of your “C” with the strips, before cutting the frame and boxing the inner part. Vi-ola! An 18″ C-notch.
MORE PICTURES!!
![1402292038778[1]](https://azfrankenjeep.com/wp-content/uploads/2014/06/14022920387781.jpg?w=168&h=300)
![1402292038219[1]](https://azfrankenjeep.com/wp-content/uploads/2014/06/14022920382191.jpg?w=168&h=300)
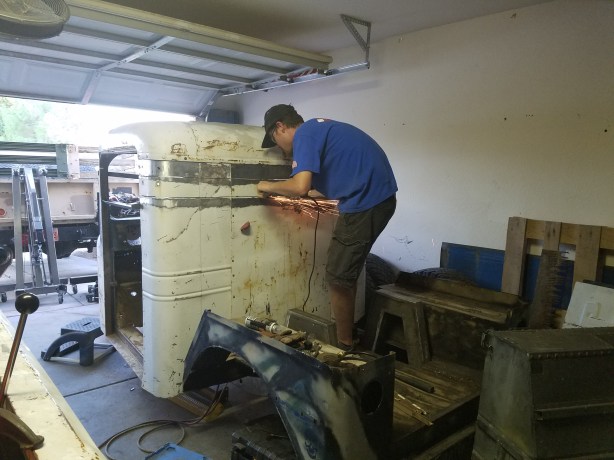
Tony got to cut the frame portions out of the notches, seeing as I had just done all of the welding. I didn’t want him to feel left out.
![IMG_1043[1]](https://azfrankenjeep.com/wp-content/uploads/2014/06/img_10431.jpg?w=224&h=300)
Now, I have never called myself a welder, and I know that there are many a man (and woman too) that could weld better than that, but… The name of the project is “FRANKENJEEP”, and it is a rat rod! It is my first real build, and I am allowed a little bit of leeway here. As long as it is functional, and safe… I am not too worried about how it looks.
Plus, you don’t get to do things this when you are worried about pretty…
![1402292037434[1]](https://azfrankenjeep.com/wp-content/uploads/2014/06/14022920374341.jpg?w=300&h=168)
Yup. I gave it a tramp stamp. Actually, Jaiden gave it a tramp stamp, that is his handwriting. Some time ago, when he was first learning to write, I had him write out his ABC’s with a Sharpie. I had him write them three times each, upper and lower case. I then scanned them into the computer, jumped on to Photoshop and took the ones I liked the best and created the word “FrankenJeep”. Afterwards, I took a yellow crayon and “traced” out the letters onto my bumper before following them with the MIG gun.
…
That is the gist of what I have accomplished since we last spoke. I know it is not the “final product” you were all waiting for, but I have also been trying to get some other things in order. For example, my neighbor Chris, has come up with an ingenious idea of a rolling bar – a 1969 Chevy flatbed pickup truck, with the back of it converted into a bar. It goes by many names, the Buccaneer’s Bowtie, and the Patina Cantina… but mostly, it goes ambiguously as – The Pirate Ship. I am to be doing the welding on it, but that is not my story to tell. *I will try and get some spy photos for you though.
We also had to repair an A/C condenser problem (on a Honda, ugh). We did a brake job on Tony’s Mazda, and I have done some minor upgrades to the little Neon. Sorry to disappoint, but the Neon is my commuter car, and I cannot afford to take it out of commission just to go all Tim Allen on it. As much as I might like to… but hey, I get a solid 35mpg out of it, there is really no reason to change any part of that. I did get some new (to me) headlights for it. I scored a pair of projector headlights for $60 at the local yard. Pretty stoked about that! Plus, they came with smoked turn signals. That is, like 5hp each… or something.
AND… the teenager just came back from Washington! That is cool, but, the last year of “I don’t know where this should go, so let’s put it in his room” went to the garage. That means I get to clean up the garage… again.
I have also been doing a lot of hunting for ideas, and trying to figure out some problems, before they give me too much grief. I have been sourcing new parts and other potential parts to see what I can get, and what I can do for this… A lot of homework, really.
An example of potential problems? I found out that my tub dimensions are 60″ outside width. My AMC 20 axle, lug to lug, is 60″. At first, I thought that would work out, but then I realized that doesn’t work at all. Not without one or two inch spacers, and a wicked backspacing, like zero. That is something I want to avoid. Stupid looking, custom wheels. [|>–o–<|] (*my poor attempt to illustrate improper backspacing on an axle)
So back to the drawing board, and I find that a Chevy full size axle is 68″. That gives me four inches on each side of the tub. Guess what? My neighbor just happens to be a Chevy guy with a line on these. Done and done. He also informed me about ensuring that my drive height does not make my driveline perfectly parallel with the differential. I never thought about it before, but I guess that the needle bearings are not meant to free float, and so you need to pitch your diff up or down just a bit to keep that from happening.
As you can see, even though I may not be in the garage working on this thing, I am always working on it. So, until next time…


![20160716_205950[1]](https://azfrankenjeep.com/wp-content/uploads/2016/08/20160716_2059501.jpg?w=614)
![20160716_210924[1]](https://azfrankenjeep.com/wp-content/uploads/2016/08/20160716_2109241.jpg?w=614)
![20160716_211814[1]](https://azfrankenjeep.com/wp-content/uploads/2016/08/20160716_2118141.jpg?w=614)

![20160717_005003[1]](https://i0.wp.com/azfrankenjeep.com/wp-content/uploads/2016/08/20160717_00500312.jpg?w=303&h=303&crop=1&ssl=1 "20160717_005003[1]")
![Screenshot_2014-08-23-19-48-43_1[1]](https://azfrankenjeep.com/wp-content/uploads/2014/08/screenshot_2014-08-23-19-48-43_11.jpg)
![Screenshot_2014-08-23-19-48-56_1[1]](https://azfrankenjeep.com/wp-content/uploads/2014/08/screenshot_2014-08-23-19-48-56_11.jpg)
![Screenshot_2014-08-24-22-11-18_1[1]](https://azfrankenjeep.com/wp-content/uploads/2014/08/screenshot_2014-08-24-22-16-36_11.jpg)
![Screenshot_2014-08-24-22-11-28_1[1]](https://azfrankenjeep.com/wp-content/uploads/2014/08/screenshot_2014-08-24-22-11-28_11.jpg)
![Screenshot_2014-08-24-22-11-39_2[1]](https://azfrankenjeep.com/wp-content/uploads/2014/08/screenshot_2014-08-24-22-11-39_21.jpg)
![IMAG0113[1]](https://azfrankenjeep.com/wp-content/uploads/2014/08/imag01131.jpg)
![IMAG0114[1]](https://azfrankenjeep.com/wp-content/uploads/2014/08/imag01141.jpg)
![IMAG0115[1]](https://azfrankenjeep.com/wp-content/uploads/2014/08/imag01151.jpg)
![IMG_1041[1]](https://azfrankenjeep.com/wp-content/uploads/2014/06/img_10401.jpg)
![IMG_1039[1]](https://azfrankenjeep.com/wp-content/uploads/2014/06/img_10381.jpg)
![1402292039147[1]](https://azfrankenjeep.com/wp-content/uploads/2014/06/14022920391471.jpg)
![1402292038560[1]](https://azfrankenjeep.com/wp-content/uploads/2014/06/14022920385601.jpg)
![1402292038778[1]](https://azfrankenjeep.com/wp-content/uploads/2014/06/14022920387781.jpg)
![1402292038219[1]](https://azfrankenjeep.com/wp-content/uploads/2014/06/14022920382191.jpg)
![IMG_1043[1]](https://azfrankenjeep.com/wp-content/uploads/2014/06/img_10431.jpg)
![1402292037434[1]](https://azfrankenjeep.com/wp-content/uploads/2014/06/14022920374341.jpg)
