Posts Tagged ‘Hot Rod Project’

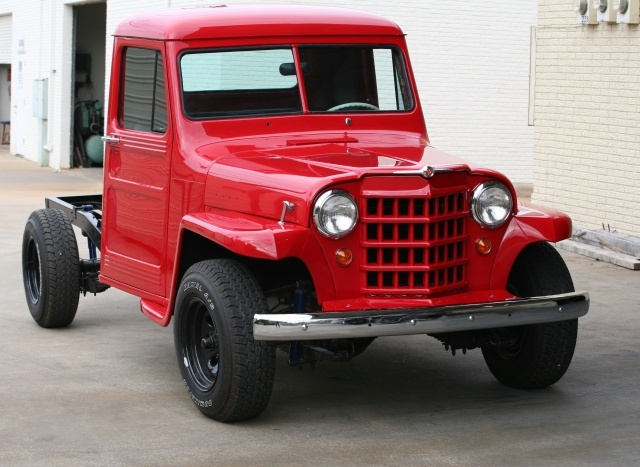
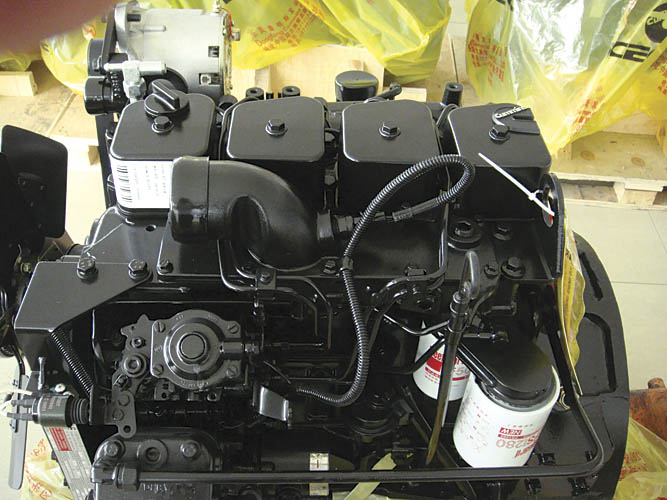
Here I am, on my way to work, and it is just a few days after Christmas. I left home on the morning of the 26th. It is now the 28th, and I just left Dubai, I am currently in Mauritius, approximately 11,339 mi (18,249 km) away from my Jeep… but, I was able to get some new goodies for the build before I left. Check out some of this stuff!

IMAG0515[1]  IMAG0513_1[1]  IMAG0514[1]  IMAG0512[1]

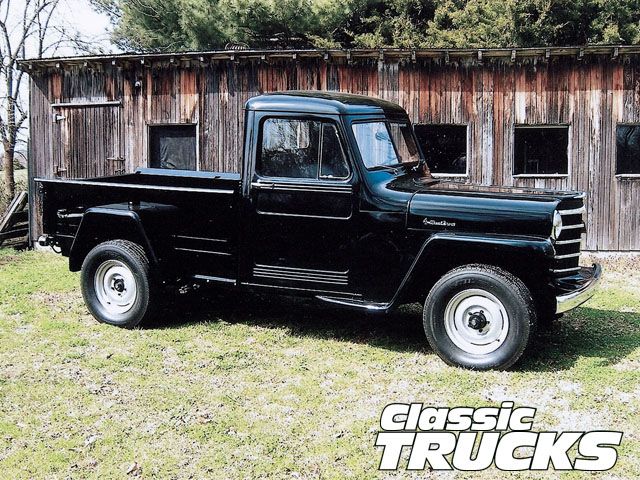
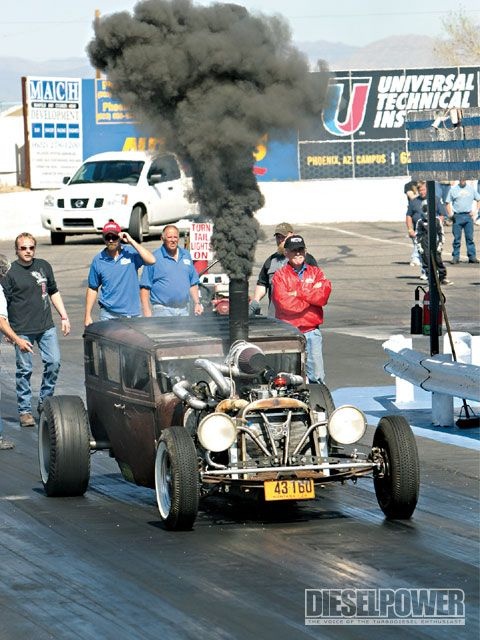
(Thank you Rick! You have been a great asset to the build!) Rick stopped by and dropped off a truck load of stuff for me! This is just a select few of the things he had to give me, I apologize for the MTV photos … I did not make time to properly showcase any of this, as I never meant to even post these pictures, they were only taken so that I could show Nathan and Tony the cool new toys I got. There is something about that steering wheel, that I really like! I think that it is the fact that the leather is all worn and perfectly patinaed. That big ol’ radiator fits perfectly behind my grille, and we are going to make the Hurst shifter handle longer, so that it comes up higher. In case you are wondering, I got two of the side-by-side seats. I plan on covering them in a seabag green canvas, but I will probably pay someone to do that, as I do not have a proper sewing machine in order to get these done they way they should be. If you are wondering what “seabag green” looks like, just think of any United States military member in transit. Or, you can check out this stock photo of one.

Screenshot_2014-12-28-16-41-37_1[1]

What now? Since it is going to be some time before I get back to the garage, I will try and get my administrative duties taken care of while I am not so distracted with all of that garage business. Although, once I do get home, I may need to hold off on the Jeep build, as the Pirate Ship will be requiring my attention due to its restrictive timeline. I will be focusing time and energy to that, until I can put it to a proper stopping point. The Pirate Ship is due to set sail the first week of April, and that means I have a lot of welding to do there. It should not take me too long though, as my welding projects are short, in nature – I just need to weld up the wench’s deck and the poop deck (the aft seating). But all of that is for another blog, this one here is for the FrankenJeep build!

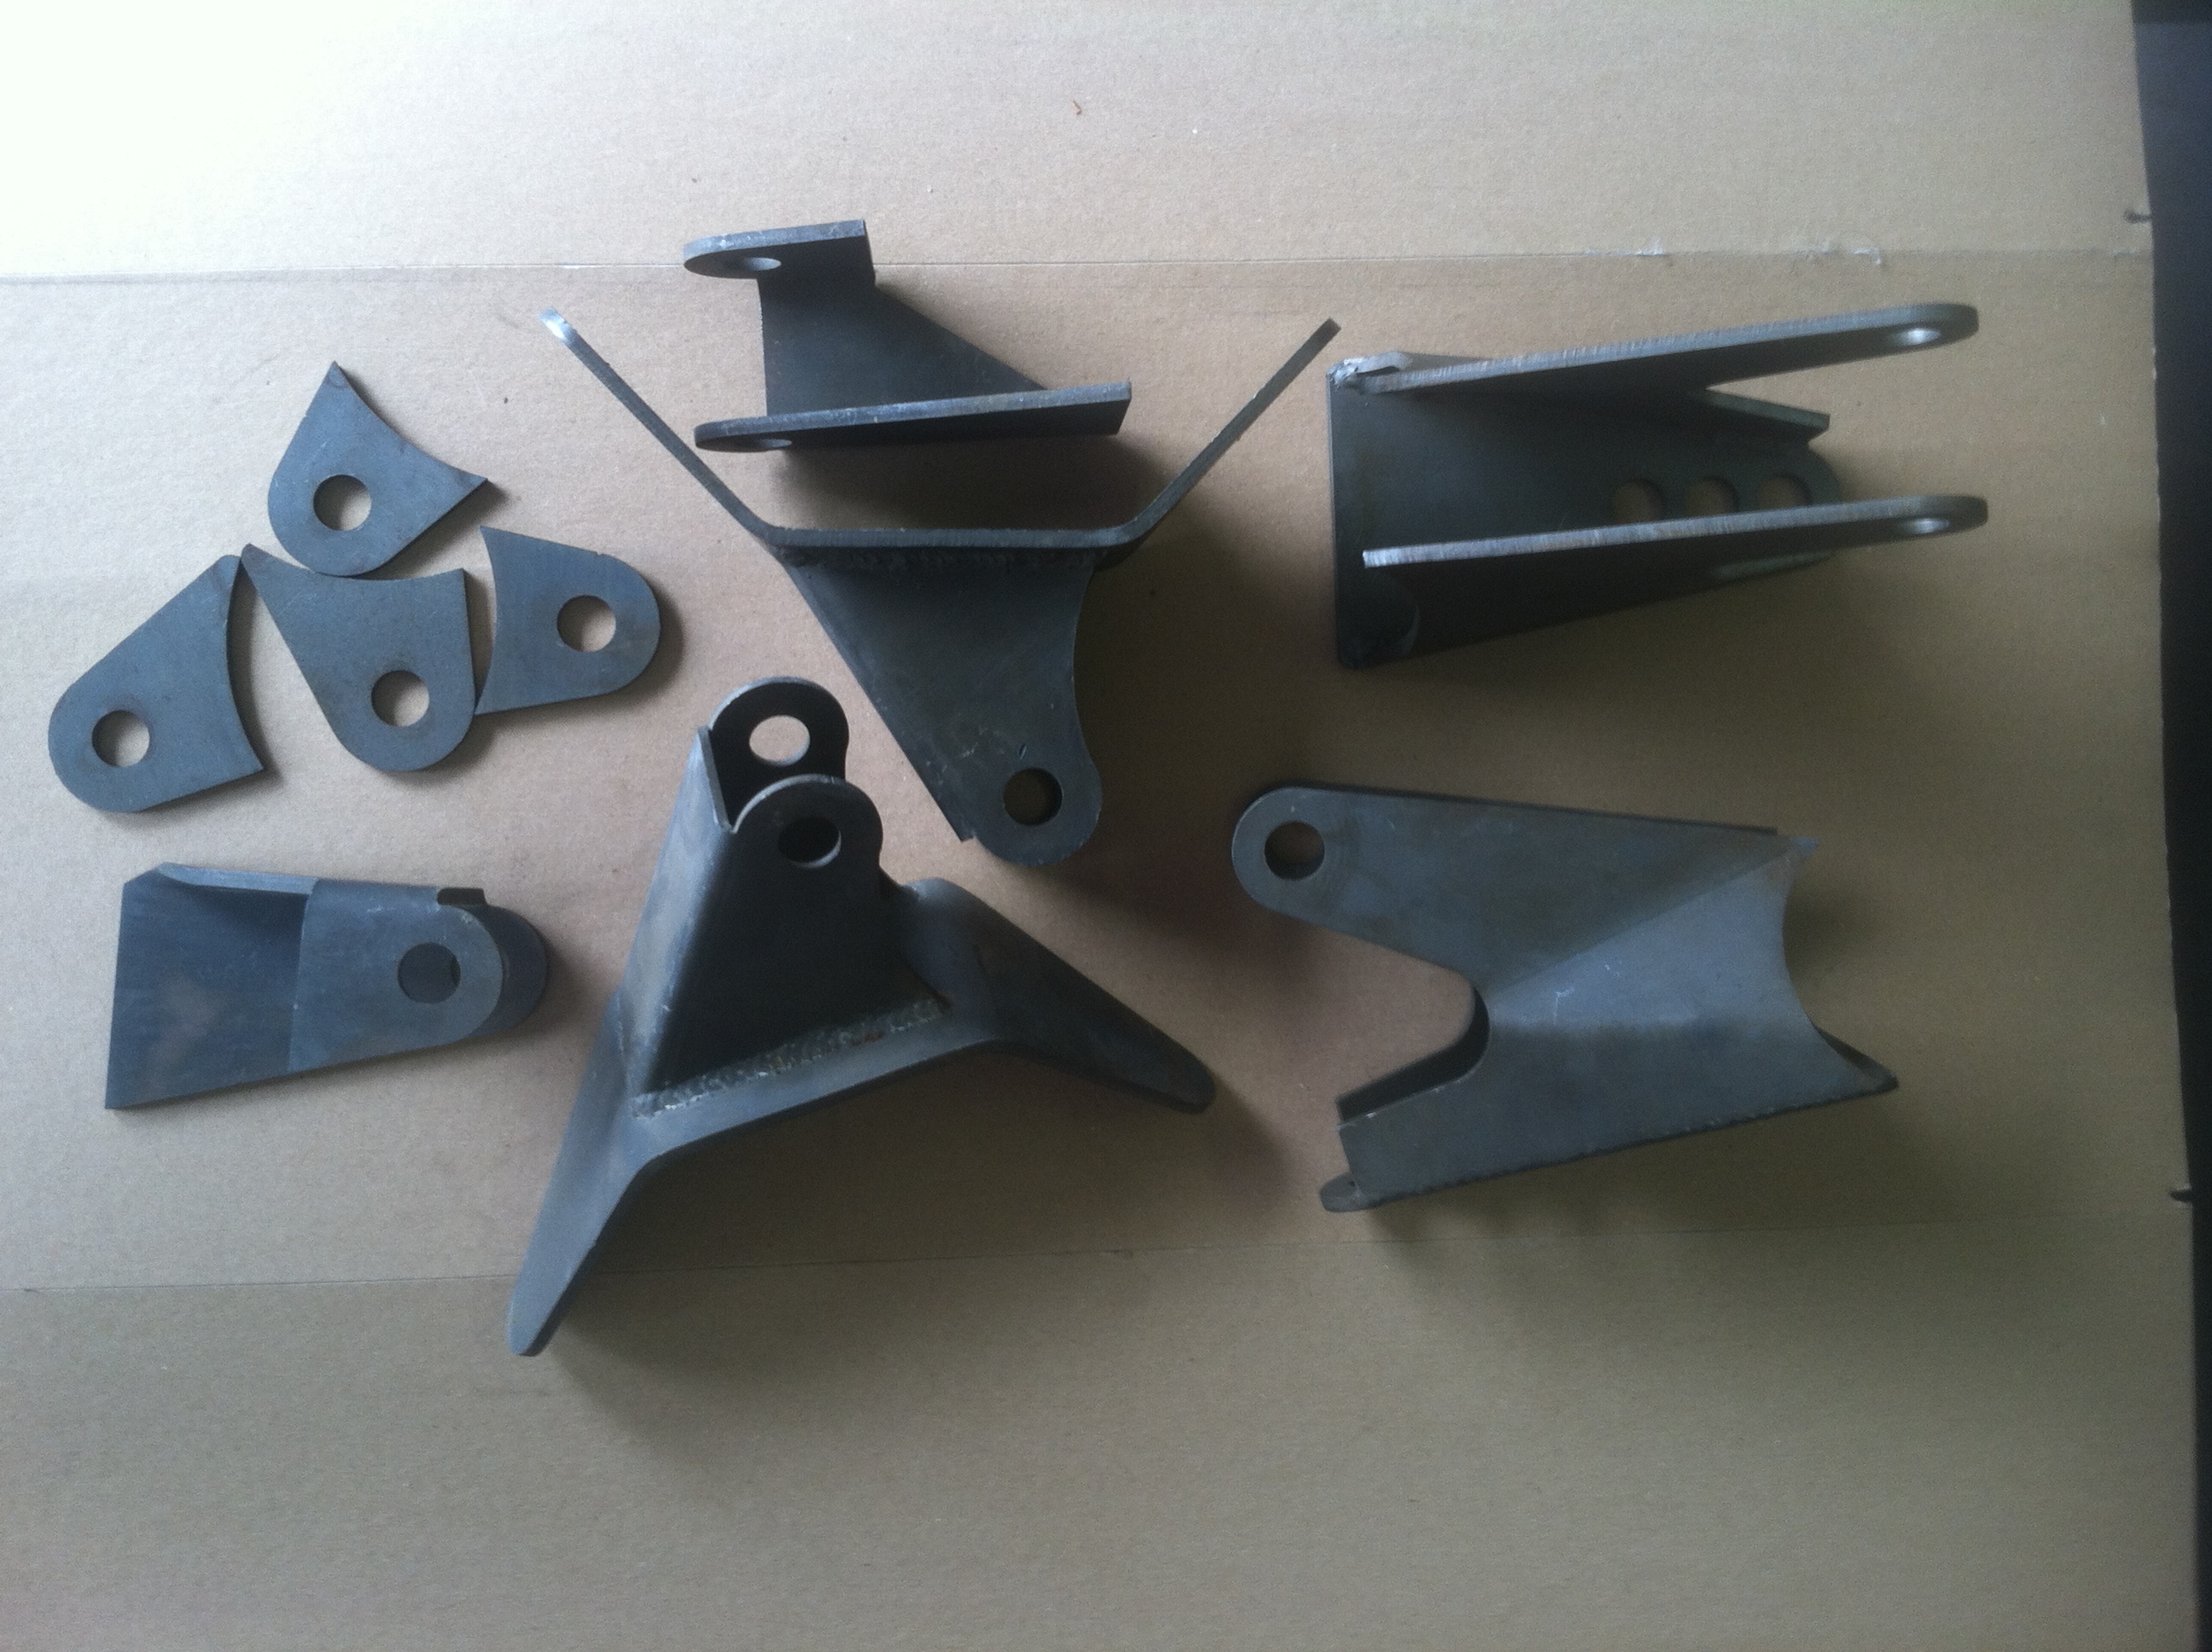
I have most of what I need to make the front drop axle. (Thank you Jerry!) He provided me with the cut up Dana 44 so that I did not need to go chopping up a perfectly good axle. He also hooked me up with the trailer drop axle. Now, I just need to get a hold of some 220V welding, and I can get to axle fabrication! I would show you some pictures here, but the problem is, I do not have it in a comprehensible state. What I mean is, even if I did have photos for you, they would make absolutely no sense, as I only have half a Dana 44 with outers (there is no center to it), and an eight foot trailer axle. I will ensure to get some build pictures for you though.

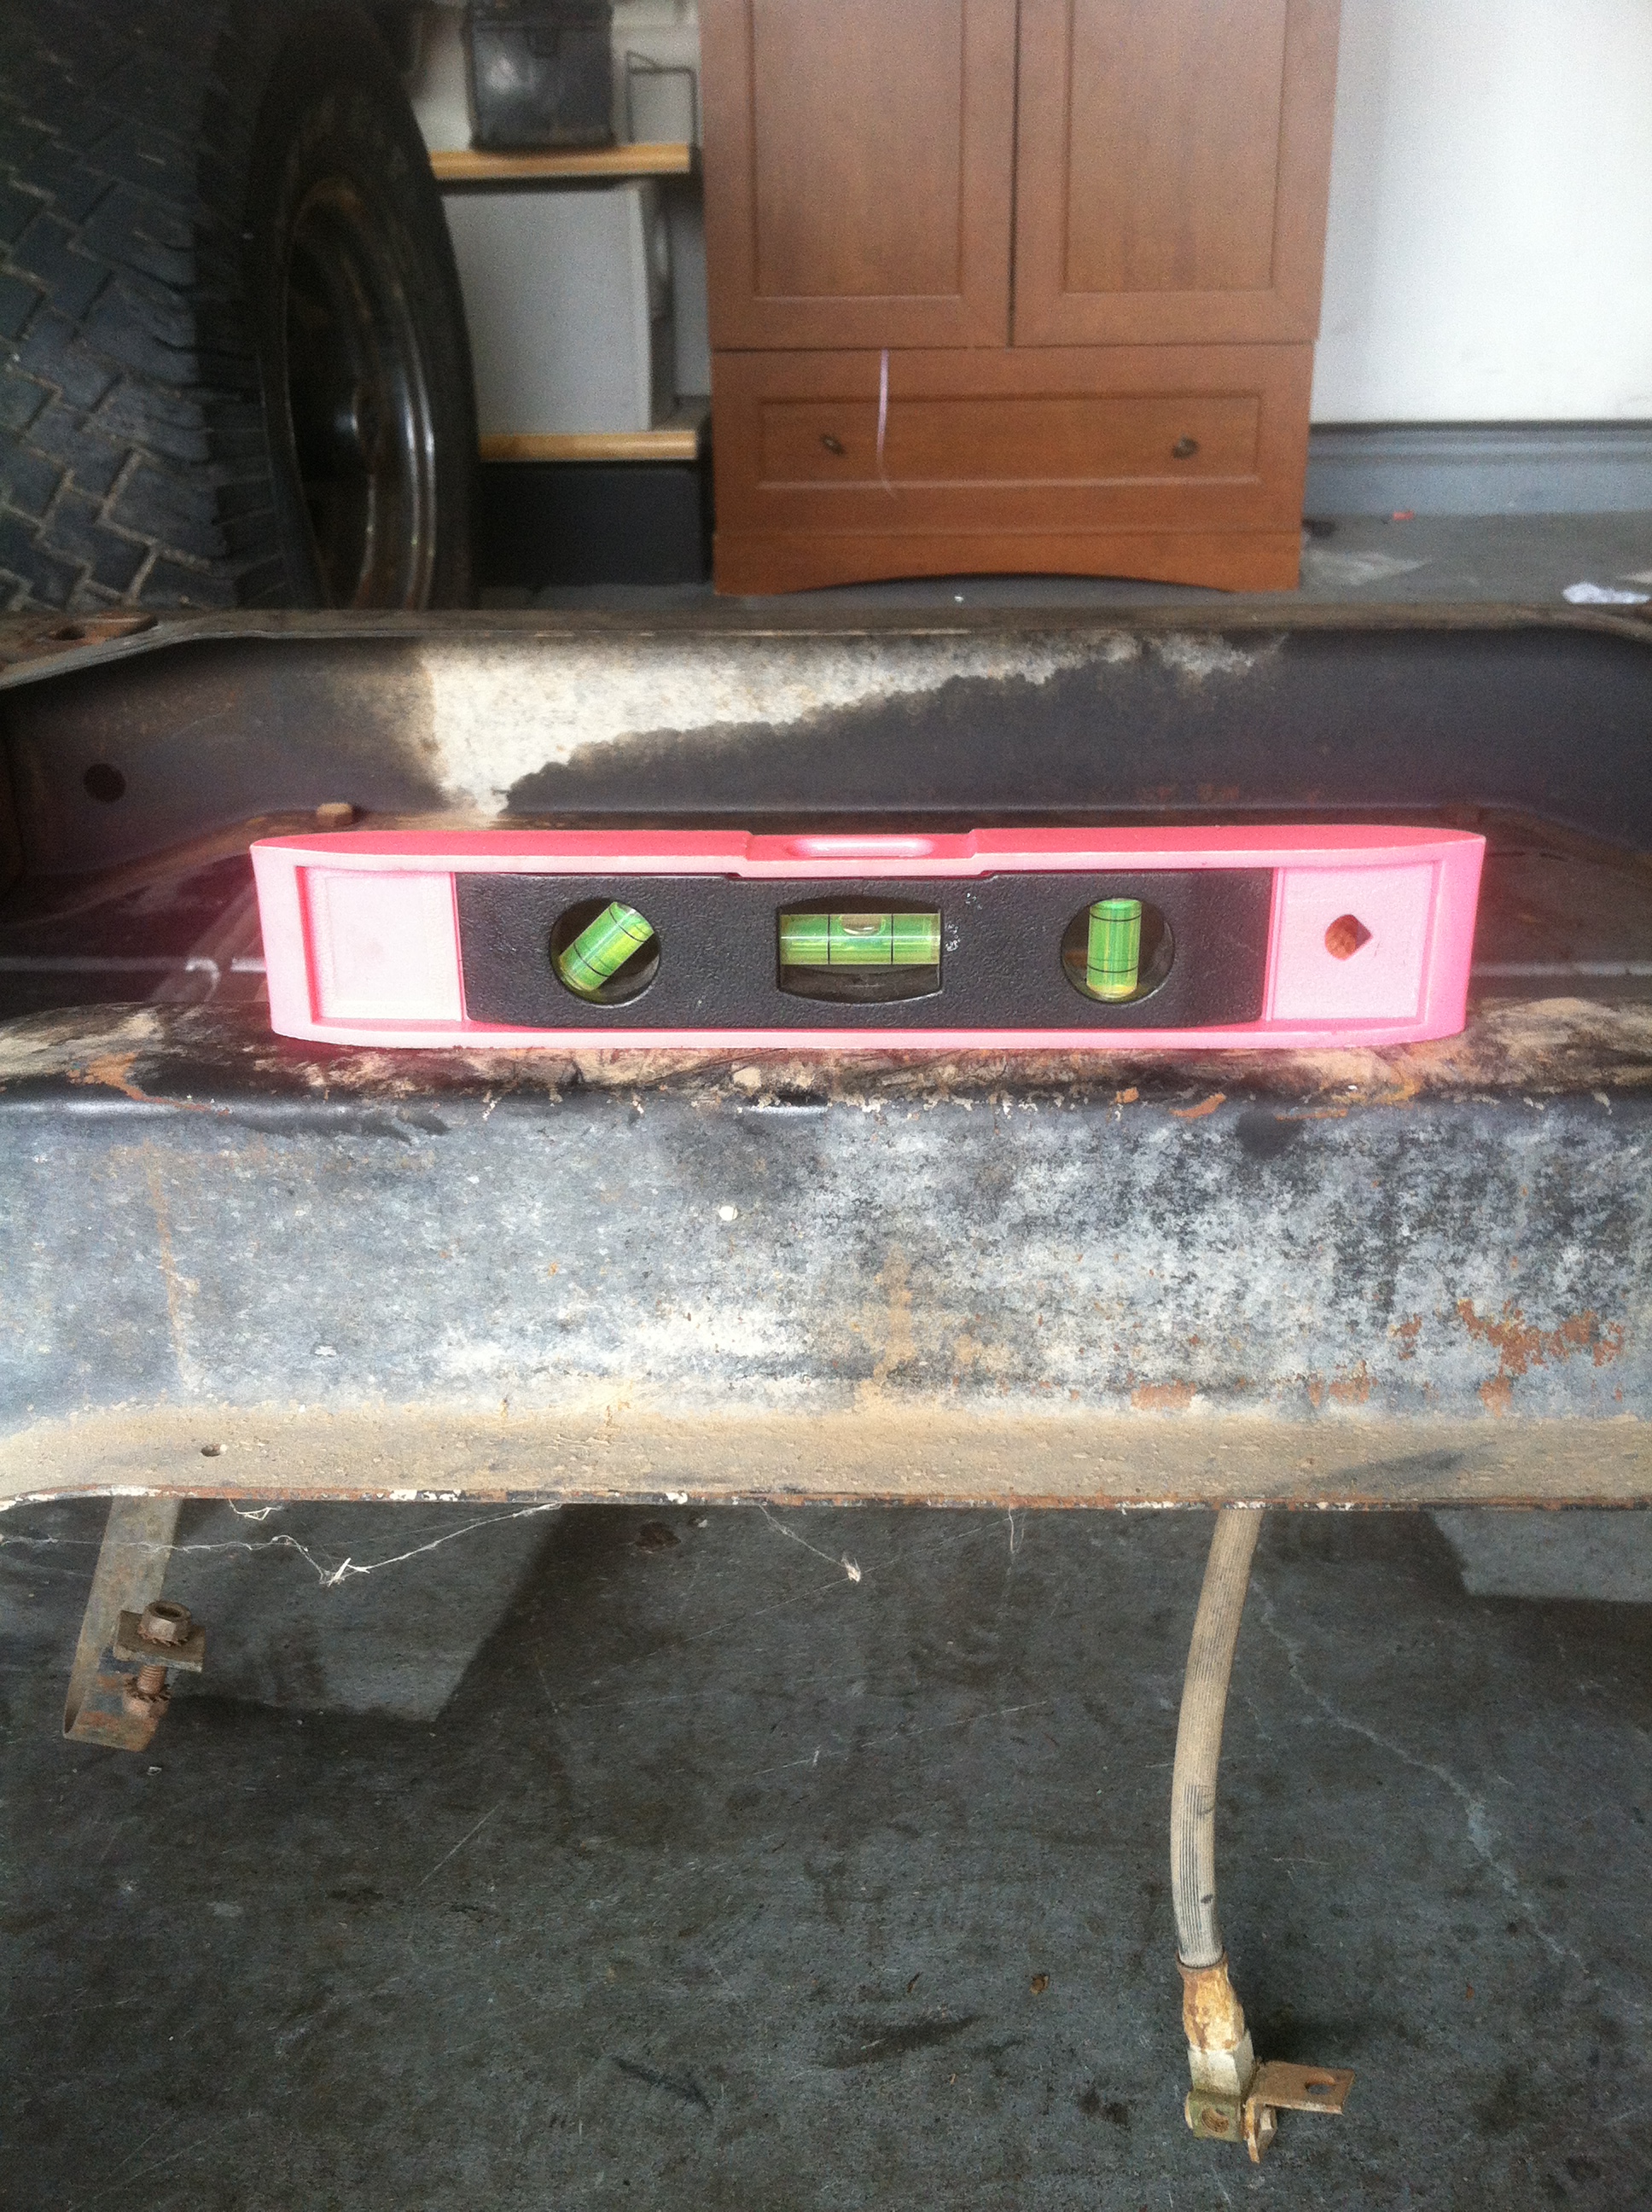
I do have a new idea, a more concise idea, on how to do the fuel tank/gauge system. I am still going to utilize the 30 lb gas gauge,IMAG0574_1[1] I have just refined its use. You see, I was trying to figure out how turn the flange 90°, so that the gauge faces outwards, towards the rear, instead of sideways. Instead of doing that, I will just mount it to the side of something back there, say… a Jerry can.

I will mount the fuel gauge to the Jerry can, like shown in the photo, and then hard mount the can to the bumper, so it is sturdy. Next, I will grommet the can through the tub of the Jeep, connecting it into the fuel cell. This does multiple things for me. Among them, it solves the fuel gauge dilemma. It gives me a fill point, in order to actually fill up the Jeep, without having an unsightly gas cap cover. It also provides me with a guaranteed five gallons of fuel, and that is good.

When I get home, I should be able to go and retrieve all of my tools. That is a very good thing! I am pretty stoked about that. I should have a fairly decent stock of tools that should get me started, at least I will be able to have most of the tools I need in order to make my jobs easier. I do not know if you are aware how difficult it is to even do maintenance on a vehicle, let alone build one, when you only have a 285 piece tool set (thank you Wes!) and an Estwing claw hammer. My brother hooked me up with a nice tool set a few years ago for Christmas. I have been using the crap out of it, and keeping it clean, ever since. The problem comes when I have more than one person working on the vehicle, and when I need two wrenches, or when I do anything electrical. So, I got a tool box and some tools coming to me, and they should be ready for pick up when I get back.

So, between the work on the Pirate Ship, and the (anticipated) short stay home, I fear that I will not make too much progress on the Jeep when I return, in February. I will ensure that I give you any updates on the projects that I do complete, and I hope to see you here again soon…

Advertisement

I am sure those of you that have been perusing these pages maybe have wondered who, or what a Mad Mac is. Or maybe you have not even noticed. Then again, it could also be that you just do not care. Regardless, I can assure you that it is not a diseased pair of all beef patties, special sauce, lettuce, cheese, pickles, onions on a sesame seed bun.

It is, however, another crazy build conglomeration that was suggested by my youngest son, Jaiden. Actually, it would be the crazy build that started it all. Maybe to say he literally “suggested” that I build a 2004 Chevrolet Impala 9C1 (General Motor’s designation for the police package) into something that would find itself comfortable as a car seen in the 1979 Australian dystopian action movie, Mad Max… well, that may be stretching the facts.

— Hang on! We are going to jump into our Delorean, and see if we can get this baby to 88 mph! —

Mad Max has been one of Jaiden’s favorite movies for quite some time now, (second to the sequel, The Road Warrior). It was 2011, and Jaiden was just four years old when he first saw these movies. Immediately, he fell in love with Max Rockatansky’s highly modified 1973 Ford Falcon XB GT Coupe, an Australian made car also known, in the Mad Max Universe, as the V8 Interceptor.

V8 Interceptor


(read all about it here – http://www.madmaxmovies.com/mad-max-interceptor/index.html)


It was during our first father/son viewing of Mad Max when a four year old Jaiden excitedly called out, “Cool cop car, Dad! Like yours!”, and that was the beginning of Mad Mac’s. I suppose it was not necessarily what Jaiden said, as much as what I interpreted his words to be, that caused the beginning of the end…

2012-04-06_18-26-28_692[1]

Meet Mac. I confess, he does not have the flair of Max’s V8 Interceptor, but he does have… character.

As I mentioned before, I was planning on this car to look as if it were to play a part in catching the bad guys after World War III happened. So, I started in the front, with the lights and the bumper. I took headlights from three different vehicles, and spent 18 hours fabricating those bug eyes.

And, what Pursuit Special would be complete without a supercharger?

1_Unknown[1]Check!

I took an Eaton M90 Series III supercharger and top end off another vehicle, and put it somewhere more deserving… a retired police car.

The conversion was not as difficult as I thought it might have been, basically a direct replacement, plug-and-play. However, it was shortly after this same time that the AZ summer was coming up, and 114°F was going to be commonplace during the day.

I started having engine issues – the motor would sputter quickly and die. Minutes later, it would let me start up again, and it would drive normally, until it would sputter a few times and die. After all the checking, rechecking, and replacing of parts, I found it was the stock coil pack computer that was bad. It was “cold soldered”, and when the heat would get to it, the electronics would separate from the board, causing an incomplete circuit.

Unfortunately, Mac was to meet an early demise, and I never got to finish this project. But his name lives on infamously, this build started a whole new thought process on the way I do vehicle builds. From this one on, all vehicles built under the Mad Mac namesake, was going to be very comfortable in a post-apocalyptic setting.

Much has gone on here since I last wrote. Actually, this is a milestone at Mad Mac’s! This is the first post I will have written with real followers (that is you!).

Every post prior to this, was written with the hopes that someone may stumble across my little (mis)adventures. But you here, have already done so. You have decided that my story is worthy enough to occasionally fill a slot in your inbox. I thank you for that.

If you are not yet a circus goer, but you like what you have seen here, look to the left and click the “Join the Circus” button. All you need to do is fill in your email, and vi-ola! you only get emails when a new story comes out. So, come on! Support the clowns, and join in on the debauchery!

If for some reason, this is your first time, and you have managed to land yourself here… Well, it is safe to say that you are no longer in Kansas anymore. So, hold tight onto your little dog, look to the upper left corner, click the “Start at the Beginning” button, and prepare to be launched forward, straight into the past! As the saying goes… “The best place to start, is at the beginning.”

——

As I was saying, much has gone on here since I last wrote. In fact, I have gotten one Dana 44 axle and my Dana 20 transfer case traded for a hopped up TH400 automatic transmission (thank you for the hook up, Rick!). I sold the AMC 20 rear end to a guy that was a day late to buy my NP208 transfer case (sorry Jerry, your buddy Tad got there a little bit before you did, but I do appreciate the hook up with that vacuum operated D44 and the trailer drop axle*).

I went through the garage, like a tornado, and cleaned up a lot of the clutter that was congesting my work area. IMAG0474

Those bins were empty when I started cleaning.

I have a few items left over from the Transmission Shaft Swap Calamity, which I am hoping to relieve myself of very soon, (mainly the two TF727 automatic transmissions). I still have various Jeep parts, and that damn Nissan motor, lying around. I do have some guys coming over to swap and trade with me, so that will also help open up the garage a bit.

Some things I had, I was not able to swap for anything worthwhile, except cash. But that worked out really well too, because I was able to get a jump on some of these killer Christmas deals and buy Mad Mac’s some tools!

Jaiden was telling us that he did not want anymore tools, when he got presents. When we went to Sears and walked into the tool department, that was remedied quickly… “Woah! Look at this tool box, Dad!” he said, grinning. “Ooh! Can I get these?!” he asked, excited. Since then, he has been dropping me subtle hints that he wants a tool box, “Are we going to Sears to get me a tool box?” he asks as soon as we are in the car. And I have to tell him, “No, Jaiden. We are just taking you to school. It is Monday. You have class today.” That kid is hil-arious!

————

Chris got me welding on the Pirate Ship… Oh, why the hell not! Here you go…

Some spy photos of the Patina Cantina:

IMAG0495 IMAG0493

If you remember correctly, I mentioned something about this in June, in the Getting Started post. If you do not remember, this was Christian’s idea. He had a 1969 Chevy 1 ton flatbed pickup truck laying around the yard, and started drinking. When a thought came to him… like lightning – “What if we drank on the bed of the truck? No… What if there was a bar on the bed of the truck? Yes!” And, we went to work, like little busy bees, or carpenter ants! As I was working there, doing whatever it was I needed to do, his wife Liz came about and exclaimed, “Oh, a pirate bar! Cool!” When asked why she thought “pirate”, she simply said, “Because you look like a pirate, Jon!” and there it was: the Buccaneer’s Bowtie was born.

IMAG0487

Now, I have told this tale to many a man, and nary a one can wrap his brain around such a daunting feat. There are those that still wish to contribute. These Kings of their various lands give what they can, to support a just cause… Belligerence and pilfering? No, not that one! A kickass pirate ship bar! (Thank you for the pirate recruiter’s flag John!)

You see, Chris supplies the truck and the rum, he also does all of the wiring and specialized engine work (but that is secondary in importance to rum). Sean works the carpentry, and spacial engineering (spAcial, not special). I am there to provide positive pirate imagery, I also do some welding and metal work. We even got Nathan in on the pirating! He got to weld some seat brackets in the aft end (we are on a pirate ship you know, there is no back end), Nathan even came up with some new ideas for the Wench’s Deck, up forward. Hopefully, he will be around when we christen it for its maiden voyage. I think that will be the perfect time to break out my stash of 30 year old Captain Kidd rum that I got in Gran Canaria.

————

I got a proper (i.e. running) 350 motor, from a 1984 GMC truck (that other one was in pieces, plus it had an electric fuel pump), and I still have that 12 bolt rear end. Now, I still have yet to put them in the garage, but that is actively in the works, and I am hoping to have them in my possession before I leave for my next hitch.

Let us see what materials we have: Motor? GM 350. Check! Transmission? TH400, with a street/strip shift kit and a kick down. Check! Axles? 12 bolt rear / Homebuilt trailer drop/Dana 44 hybrid. Check! and Whoa, not quite! Frame notched? 18 inches. Check! Air bags? Got ’em! Suspension? Same as the ‘bags – got it! Steering? Nope! Tub/body? It’s thereWiring and electronics? Not even a thought yet! 

Yeah, I think I have everything under control!

*I am sure you were curious about the little asterisk after the shout out about the axles. No? Surely you noticed it! Well I shall explain it anyhow… because I am dying to tell you!

You see, hot rod guys like to use a front axle that drops the suspension, keeping the front end low – a drop axle.

It looks something like this: yhst-92388287498660_2253_13408816_1

When it is placed on the car, it looks something like this:Screenshot_2014-12-10-20-39-00_1

My goal is to use a drop axle from a trailer, splice it and weld the spindles on from a Dana 44. That should make a Jeep-worthy drop axle! It should be pretty burley when it is finished. I must remember to get before/after (AND during) photos.

Well, that is what I have for you, as of now. I will get some more pictures once the garage is cleaned up better.

Until next time…

I finally got back from work, and it has just started to cool off here. It was in the high 90’s today.

My plans for this month:

1) Prepare the frame for suspension – This means that I will be grinding smooth all of the welds on the frame, in order to make it presentable to the public.

2) Get my 12 bolt axle home so I can mock up the suspension – Pretty self explanatory here. The axle currently resides at a friend’s house, it will serve better purpose in my garage.

3) Prepare my engine to go to the shop for upgrades – I have found a shop that is close (enough) to me and is willing to do my engine work. Actually, this shop has greater plans in store for my engine! I was going for a 383 stroker, but he talked me into a 409, I am not complaining. Of course, this here, is the guy that was talked into supercharging his Impala! All that took, was my neighbor buying me a 3800 Series III top end with supercharger using the money I gave to him to buy me some new heads. Eh, who am I to turn down a supercharger? Also, who am I to turn down a better engine build?

As you might have guessed, more horsepower is not a difficult sell to me.

Anything new? But of course!

I got a new (to me) gas gauge! Nothing in this world is truly free, and my “free” gas gauge was no exception. We could look at it like… I spent 336 hours working it off – not including the 30 hours, and 11,050 miles of flight time! Or, we could look at it like… I went on a working vacation and made new friends, obtaining a gas gauge in the process!

IMAG0137[1]

My plans are to strip off all of the paint, and then mount this to the rear of the tub, facing outward, and plumb it directly to the fuel cell. I will need a lot of reinforcement for this gauge, as it still weighs over 30lbs!

On our maiden voyage, I will just fill the cell until it is topped off, and then I will drive the hot rod until I run out of gas. After I figure out how many miles I got out of the tank, I will subtract 25-50 miles, and just drive by my odometer.

When you have owned as much crap as I have (of the 30 something vehicles I have owned, maybe ten of them had 100% completely functional gauges), you find it very easy to work around not being able to use things that many people take for granted. Things like fuel gauges, and air conditioning, and steering wheels.

Okay, well I suppose I never had many issues with my steering wheels. Nope, I lied! I had a ’72 Ford pick up truck that had steering wheel problems – the retaining nut came off and so did the steering wheel. So there you are, crap!

Anyhow, I must give a shout out to Elvis Ramirez Torres, and Luis Yavé Ortega Hernández from Las Palmas, Gran Canaria. For if it were not for Elvis, I would have not been able to get this top cap welded on, and if it were not for Luis, I would not have been able to tell Elvis that I needed to get this top cap welded on!

You see, while I was at work, I was removing an oil tank. I saw this level gauge, and thought it would make a kick ass fuel gauge. What I didn’t take into immediate consideration is the fact that the gauge weighed about 90lbs!

True story.

Well, I talked with the welder and his interpreter (Elvis & Luis), and we figured out how to cut it up and re-weld the cap to it. I got all the cutting and grinding done, so that Elvis just had to come in and weld it all up. He told me that I need to be careful with it, because it was delicate. He said he tried a different electrode, and the cap just fell off! So he got this one working, but was afraid it might still be too fragile. I tried to explain that it was just a vent cap, and that it would not see any pressure or stress, but he insisted on warning me to be careful with it.

Hell, what do I know? When someone is that adamant about their work, and they are explaining the precautions to you in a different language (than what you are used to speaking), I find that you generally go along with it.

Don’t worry Elvis, I will be careful with it. I would hate to have to go through the airport with that gauge again if I broke it! (Luis, would you please translate that for me? ¡Hola, Por Favor Señior!)

So, I suppose it is time for me to get off the computer, and into the garage. We have a hot rod to build! I will keep you posted on my progress soon.

Until then…

So, what have we been up to lately? Um, not much. It is really gnarly out there! Been in the 100s here and there, and when it wasn’t hot, it was busy monsooning, and when it wasn’t doing that… I was camping with the boy.

I know… He is making excuses so he doesn’t have to work. Well, sort of. Yes. And no.

“Really, what has been going on?” you may ask yourself.

Well, the Navy SEALs have a saying – “Proper prior preparation prevents piss-poor performance.” Suffice it to say that I have not properly prepared for this project, and therefore I have produced piss-poor product. My apologies. Really.

What am I to do about this? Well, I am starting by admitting my fault, writing down my plan of action, and turning to. Actually, I have been hung up on this 4bt turbo diesel. As much as I want one, it is just not in the cards right now.

So, what are my options? I can wait around until I get the money to buy one – as we can see, that is not working out so very well, or I could take this opportunity to use my resources and just get something done – and that is what happened.

I came to a realization after talking with my buddy, David (who has the uncanny ability to make me come to my own realizations and figure out actual conclusions about what I need done, thus putting a fire under my ass – a sort of Jiminy Cricket, if you will). We were talking about a multitude of different things, when the subject of my hot rod came up. I had mentioned that I was hung up on this turbo diesel, but when I came back from Spain, I would have the cash to buy one.

That would be great, but in doing so, it would negate the whole “budget build/rat rod” aspect if I go and spend $3500 on a drivetrain.

That brought me to thinking of other options. As it turns out, I have a perfectly capable AMC 360 sitting in the garage. A smogged, slug of a V8 that currently produces about 160hp. Not really that impressive, but, it is approximately the same weight as a 4bt. This means that I can build the rig, drive it around, have some fun (with my cheap ass rat rod). Later on, when I have the money, I can upgrade to the diesel, even if I have to drive a slug around until I can afford the new motor. Or will I?

Thanks to the internet, and the sick minded (I mean like minded), I have found that my problems have been answered, and I have been proven wrong. I won’t have to drive around a slug!

This engine has been sitting around for no less than two years, so it won’t be a drop in, plug-and-play. I will need to rebuild it. While perusing the interweb for rebuild kits, I stumbled back onto the International Full Size Jeep Association forum, and found a budget build AMC 383 Stroker, starting with a 360, for an extra $650 over rebuild cost.

Thank you Greg! He was able to build a 400+hp bruiser of a motor, for about the tune of $1200! I am definitely capable of swinging something like that. Take a look:

Screenshot_2014-08-23-19-48-43_1[1]

Screenshot_2014-08-23-19-48-56_1[1]

So, this is my new mission. When I come back from Spain, I will be stripping down the motor and getting it ready to use this recipe. Basically, what he did was machine the motor to accept small block Chevy 400 pistons. Here is a quick rundown of how it works:


Screenshot_2014-08-24-22-11-18_1[1] Screenshot_2014-08-24-22-11-28_1[1]Screenshot_2014-08-24-22-11-39_1[1] Screenshot_2014-08-24-22-11-39_2[1]Screenshot_2014-08-24-22-19-49_1[1]Screenshot_2014-08-24-22-16-36_1[1]

For the full write up, go check it out at the IFSJA forum: http://www.ifsja.org/forums/vb/showthread.php?t=110924

So, I have a new direction and some more homework to get done. I did find out there is a disc brake conversion for that 12 bolt, so that is something that will be coming up later on. I also decided that I wanted the edges of the c-notches to be ground down. So I started that today, with good progress!

This just a quick sketch of what the whole thing will look like. I will be getting a couple of 7″ grinders to help cut through the nasty stuff before I come back over it with the 4.5″ and a flapper disc.

IMAG0113[1]IMAG0114[1]IMAG0115[1]

I am off to Spain for work, but after I come back, I will have some new updates. That first weekend I am home, we will be having a wrenching party, and I will let you know how it all works out.

Until next time…

Oh yeah, I found some pictures of my arch nemesis, and mortal enemy: Kamikaze.

Now, he doesn’t know he is my mortal enemy, and it does not take up much of his time, but he will rue the day! No. Probably not.

But, does this not look familiar? A right hand drive, open wheeled, flat rod style vehicle with no top… And it was built in my own back yard!! Well, not literally, in my own back yard. This guy has his shop in Mesa, AZ. But that is only 20 minutes away.

Is it not funny? Life? I mean, here I am, a guy trying to “do his own thing”, and I take up an obscure project: a 1972 AM General Dispatcher Jeep – a right hand drive mail delivery vehicle, and I plan for it to become a rat rod. Why did I choose rat rod (excuse me – flat rod)? For the simple fact that I did not want to become another 4WD DJ. And, here we are, someone beat me to the punch! A RHD flat rod… of sorts.

I went to do more research on this guy, and I have seen other pictures of him. I must say, I do admire the workmanship. Not too shabby!

Kamikaze - Front Suspension (1)Kamikaze - Front Suspension (3)Kamikaze - Transmission TunnelKamikaze - Rear Frame

So, now that I have an arch nemesis, what will I do? Get some ideas, and build my rig. Just like I would have, before I found out I had a mortal enemy.

After all, I did get the original idea, sparked from Randy Ellis, in Phoenix (he made the green Army flat rod I showed you pictures of in Genesis – The Revelation). Besides, isn’t that what this whole hot rod / rat rod / custom / kustom scene is all about? Do what you like, and who cares what others think. Hopefully, your build will inspire others to come up with their own creative ideas, thus continuing the cycle, and keeping the spirit of building rods alive!

I mean, as long as you aren’t just finding old iron, and rolling it into a shop to have them do all of your work, from conception to completion as you write checks and sit back, saying “Look at what I have done!” I think, so what? Fuck ’em. Who cares what your rod looks like. Do you love it? That is all that matters. Do what makes you happy. Show what inspires you!

You want to put a V-Tech Honda motor into a ’32 Ford, do it! I don’t agree with it, but I have seen it done. I believe that it is the idea, others will interpret it differently, just ensure it brings you joy. Whether it be hot, rat, volks, flat, or traditional – build what makes you happy, and if someone else likes it, great. If not, oh well, I am sure there is a Porsche dealership nearby that they may drool all over the new Panamera Z. (Really guys? A four door Porsche? I am sure that Ferdinand Porsche is rolling in his grave right now. Or maybe not… what the hell do I know. I’m building a right hand steering, two-wheel drive, diesel powered, lowered Jeep on 33 inch tires!)

But, back to that point of, do it for you. Do not worry about what the other Joe is going to think about your build. After all, do you think he cares about your opinion?

And remember this: Just because you paint your car, truck, or van flat black… That does not make it a rat rod. When a guy spends $150k to have an old car “built”, and it happens to have a patina finish… It is not a rat rod!

In the most purest of terms, “Rat Rod” is simply “function before beauty“, meaning, take what you have, and make it work. You still need to actually put forth an effort, because life is not “Build a Car Reality Series“. You do not get paid commission, and there is no reason to put out shit, just in the name of “Rat”.


*Disclaimer: Kamikaze is not really my arch nemesis, I do not even know the guy, nor does he know me. I was looking for ideas on what to do with FrankenJeep, when I came across this. The fact that his rod is an open wheeled, roadster, with right hand drive is purely coincidental. The fact that it just so happens to be a Suzuki Samurai, is just mean irony. I hold no ill feelings toward this rod or its builder, and I hope to get FrankenJeep done in a fashionable time, enough to meet him in person. It would be fun to have these two vehicles side by side – mortal enemies, Jeep and Samurai.


And where have I been spending my time lately? Well, to speak the truth – a lot at work, a little bit at the house, and even less in the garage. If you didn’t know, I work on an oil rig, and I am gone for nearly a month at a time. So it is not like I get paid to work on this thing all day every day. But, that does not mean I have completely shirked my duties in the build. I got something done! Well, sort of… I got something mostly done.

So, I haven’t gotten as far on the build as I wanted to. What is it that I did get accomplished, you may ask?

I got most of the frame welded up. Earlier, I showed you my monster C-notches. Well, I got them (mostly) installed, I need to weld three more plates onto it, and I will be good to start work on the suspension. Tony and I had to do a lot of framework, in order to get these things to sit properly.

See?

IMG_1041[1]IMG_1040[1]IMG_1039[1]IMG_1038[1]

These are not “before and after” pictures, they are left side/right side pictures. There was a crossmember we had to cut out, and there was a lot of boxing in of the frame that needed to be done. But after all that work, we were able to place the notches, and get them ready for final install.

1402292039147[1]1402292038560[1]


If you remember correctly, my C-notches came to me as multiple pieces of CNC cut metal – (4) “C” pieces, (4) outer strips, (4) inner strips, (2) uppers and (2) lowers.

The idea behind this is to place the “C” where you want it on the frame, and tack weld it there. Place another “C” in the exact same spot, on the other side of that frame rail, and tack it there. When the placement is good, simply weld it all up, boxing the outer part of your “C” with the strips, before cutting the frame and boxing the inner part. Vi-ola! An 18″ C-notch.

MORE PICTURES!!

1402292038778[1]1402292038219[1]

Tony got to cut the frame portions out of the notches, seeing as I had just done all of the welding. I didn’t want him to feel left out.

IMG_1043[1]

Now, I have never called myself a welder, and I know that there are many a man (and woman too) that could weld better than that, but… The name of the project is “FRANKENJEEP”, and it is a rat rod! It is my first real build, and I am allowed a little bit of leeway here. As long as it is functional, and safe… I am not too worried about how it looks.

Plus, you don’t get to do things this when you are worried about pretty…

1402292037434[1]

Yup. I gave it a tramp stamp. Actually, Jaiden gave it a tramp stamp, that is his handwriting. Some time ago, when he was first learning to write, I had him write out his ABC’s with a Sharpie. I had him write them three times each, upper and lower case. I then scanned them into the computer, jumped on to Photoshop and took the ones I liked the best and created the word “FrankenJeep”. Afterwards, I took a yellow crayon and “traced” out the letters onto my bumper before following them with the MIG gun.

That is the gist of what I have accomplished since we last spoke. I know it is not the “final product” you were all waiting for, but I have also been trying to get some other things in order. For example, my neighbor Chris, has come up with an ingenious idea of a rolling bar – a 1969 Chevy flatbed pickup truck, with the back of it converted into a bar. It goes by many names, the Buccaneer’s Bowtie, and the Patina Cantina… but mostly, it goes ambiguously as – The Pirate Ship. I am to be doing the welding on it, but that is not my story to tell. *I will try and get some spy photos for you though.

We also had to repair an A/C condenser problem (on a Honda, ugh). We did a brake job on Tony’s Mazda, and I have done some minor upgrades to the little Neon. Sorry to disappoint, but the Neon is my commuter car, and I cannot afford to take it out of commission just to go all Tim Allen on it. As much as I might like to… but hey, I get a solid 35mpg out of it, there is really no reason to change any part of that. I did get some new (to me) headlights for it. I scored a pair of projector headlights for $60 at the local yard. Pretty stoked about that! Plus, they came with smoked turn signals. That is, like 5hp each… or something.

AND… the teenager just came back from Washington! That is cool, but, the last year of “I don’t know where this should go, so let’s put it in his room” went to the garage. That means I get to clean up the garage… again.

I have also been doing a lot of hunting for ideas, and trying to figure out some problems, before they give me too much grief. I have been sourcing new parts and other potential parts to see what I can get, and what I can do for this… A lot of homework, really.

An example of potential problems? I found out that my tub dimensions are 60″ outside width. My AMC 20 axle, lug to lug, is 60″. At first, I thought that would work out, but then I realized that doesn’t work at all. Not without one or two inch spacers, and a wicked backspacing, like zero. That is something I want to avoid. Stupid looking, custom wheels. [|>–o–<|] (*my poor attempt to illustrate improper backspacing on an axle)

So back to the drawing board, and I find that a Chevy full size axle is 68″. That gives me four inches on each side of the tub. Guess what? My neighbor just happens to be a Chevy guy with a line on these. Done and done. He also informed me about ensuring that my drive height does not make my driveline perfectly parallel with the differential. I never thought about it before, but I guess that the needle bearings are not meant to free float, and so you need to pitch your diff up or down just a bit to keep that from happening.

As you can see, even though I may not be in the garage working on this thing, I am always working on it. So, until next time…


Hey there everyone!

I have spent the last few days getting supplies ready to work on the monster, dubbed FrankenJeep.  So far, I have acquired the air bags, the four-link setup, the required c-notch, a 110 welder and a small 8 gallon air compressor, as well as some other various tools of the trade.

Oh yeah, I found a new blower for my engine!

IMG_1013

If I could only figure out how to get it off the oil rig, and to my house.

Just kidding, but it sure would be cool!  I did, however, get a box of goodies!

IMG_1025

Air bags, lines, & fittings, as well as my four-link, courtesy of Travis, and the guys at WheelsNParts.

IMG_1026

IMG_1024  IMG_1028

I also got my custom cut, 13.5″ monster c-notch, set.  Thank you to Kevin, and the guys at Just Plain Trick, in Mesa, for hooking it up!

IMG_1037 

Time to get to work!

——————————–
THE IDEA
——————————–
So, I bought this little DJ-5B for a Jeep project in 2012.
 DSCN1326 DSCN1327

Originally, I was going to turn it into a 4×4. Although I have only seen a few guys actually convert these little DJs over to four wheel drive, most of the time very little is left of them for wheeling (maybe the grille, and the fact that they are right hand drive). [To the credit of the guys at Petersen’s 4Wheel & Off Road, they built a very capable 4×4 DJ-5, but it was more of a work horse than an off road machine.] And then there was the fact that there are three other DJs in Arizona that have been converted over to 4WD.

——————————–
THE REVELATION
——————————–

After I thought about the technicalities of a (cheap) four wheel drive, manual steering setup for this right hand drive Jeep, I figured that maybe I was about to start another project doomed for the chop shop. [After all, after owning it for two years, the only thing I had done to it thus far, was have it moved from Glendale to Queen Creek, from Queen Creek to San Tan Valley, and from my old house to my new house (next door). Although, I suppose if you look at the distances, and take that into account, you can see that I actually did make progress with each move, but I only brought it closer. Now it was time to really work on it.] And then I decided to go the way of the flat rod, except I know it can be done with much more… well, much more my style.

I caught wind of this thing called a Flat Rod, and I had to look more into it. I had seen a couple of them done and loved the idea. A flat fender Jeep, a hot rod… a flat rod. It is a Jeep… a hot rod… a custom build… What else could I do with this? My mind started racing, and the idea floodgates were opened wide.

I started looking on the web for ideas from pictures of built flat rods, so I could see how others had done it before me. As I have seen a few of these done, I have only found two done that were built with any style. These are some pictures of the two Jeeps that helped give me the idea.

A shop in Texas built this:


And a shop in Phoenix built this one, the one that got my attention:


——————————–

THE BEGINNING
——————————–
The little Jeep started life as a DJ-5B, a postal Jeep.
IMG_0628
Of course, life was simpler back then, going house to house, on its little postal route. Then, funny as life is, it ends up in my garage, destined to become something… well, all I can say is it won’t be the same little postal Jeep it once was.
——————————–
THE LOOK
——————————–
This is an idea of what I will be going for; except, I believe that it can be executed much better.
IMG_0614
I want to combine this idea here, of the postal hot rod, with the idea of the flat rod, and build something a little different. I want to use a Willys pick up cab roof, grille and (possibly) hood, instead of the DJ-5 metal.
IMG_0612 IMG_0613
The cowl is the same shape and size, so they should carry over quite easily. I will be chopping the roof of the cab, before grafting it onto the DJ.  As far as the hood goes, if it needs to be cut in order to fit the engine, it will just be skipped, but I have ideas for either with or without it.
——————————–
THE POWER
——————————–
Speaking of the engine, I have located a line on a group of 4BT diesel engines, here in Phoenix, and the idea is to make this into a diesel rod. The 4BT is practically cast from the same block as what was found in the first generation Dodge/Cummins, 6BT diesel trucks (1989-1998), less two cylinders.
Engines-Cummins-4BT-101673
——————————–
THE MUSE
——————————–
The diesel rat idea came from this beast.
8fd5455d03f14c19cbbbdadd77a9c4cf

http://www.youtube.com/watch?v=aMevqNjVV3M

Might I suggest you watch the whole two minutes, the ending is pretty good!

In case you were wondering, that is a 1928 Dodge Brothers Sedan with a 6BT, Cummins twin-turbo diesel. It puts out 1270 lbs-ft of torque, 693 rwhp, and weighs in at 3800 lbs. He runs 11.69 at 118 mph in the quarter mile, and it also consistently gets 23-25 mpg.

——————————–
THE REALITY
——————————–
Now, I know, I am notorious for talking about projects and not following through. I am turning over a new leaf here, and have decided that if I can’t get something, anything, done to the project while I am home on my off time, then it is time to reassess the situation, and maybe I should not have a project right now.
——————————–
THE PROOF
——————————–
My last time in, my son Jaiden helped me and my buddy, Tony, take off the tub and strip it all down to frame. Jaiden got to remove the dashboard and the pedals, all by himself.
This is what we got done that day.
IMG_0753
My goal this time in, was to clean the frame and prepare it for the drop channel to be welded. Tony came back over, and we re-rearranged the garage (again) and stripped the frame, then set it at ride height… 6″ above ground.
*EDIT: After I talked it over with multiple people, I found that my ride height will be more along the lines of 1-2″ above ground. It will still park frame.
——————————–
THE NEXT STEP
——————————–
Now that we have established ride height, it is necessary to fabricate a front end suspension for the chassis and to C-notch the rear end for axle clearance. I will be using the AMC 20 axle that came from my ’84 Wagoneer as a rear axle, and will be driving 33″ tires, front and rear.
. . .
Ultimately, I would like this to park and lay frame, but I find me going Jiminy Cricket on myself, and I have been trying to keep the scope creep to a minimum. This means that I have an original idea, and I need to stick to it. I need to keep from adding to it, and complicating it more than I already have. So, I may find that ride height, and park height are the same. We will see how that all pans out.
——————————–
THE VERDICT
——————————–
I had to check the frame true.
 IMG_0989 IMG_0990
Looks like the bubble is happy!