Posts Tagged ‘FrankenJeep’

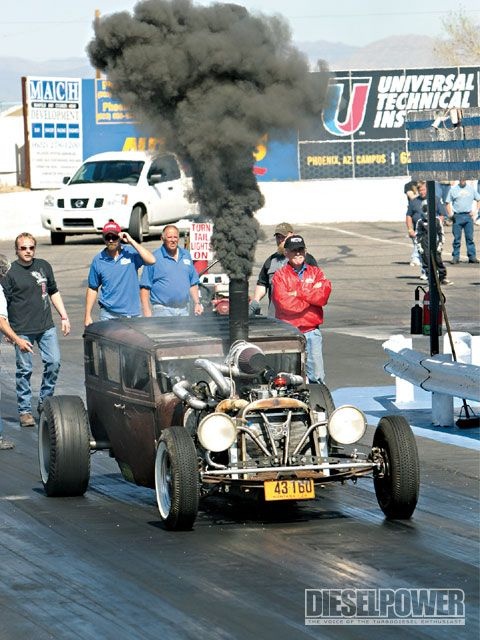
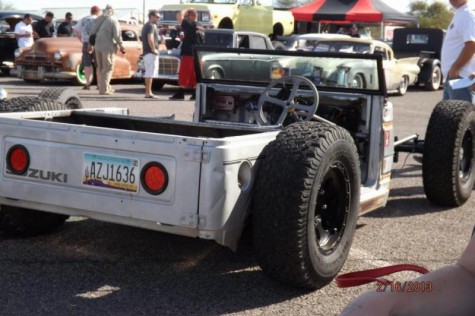
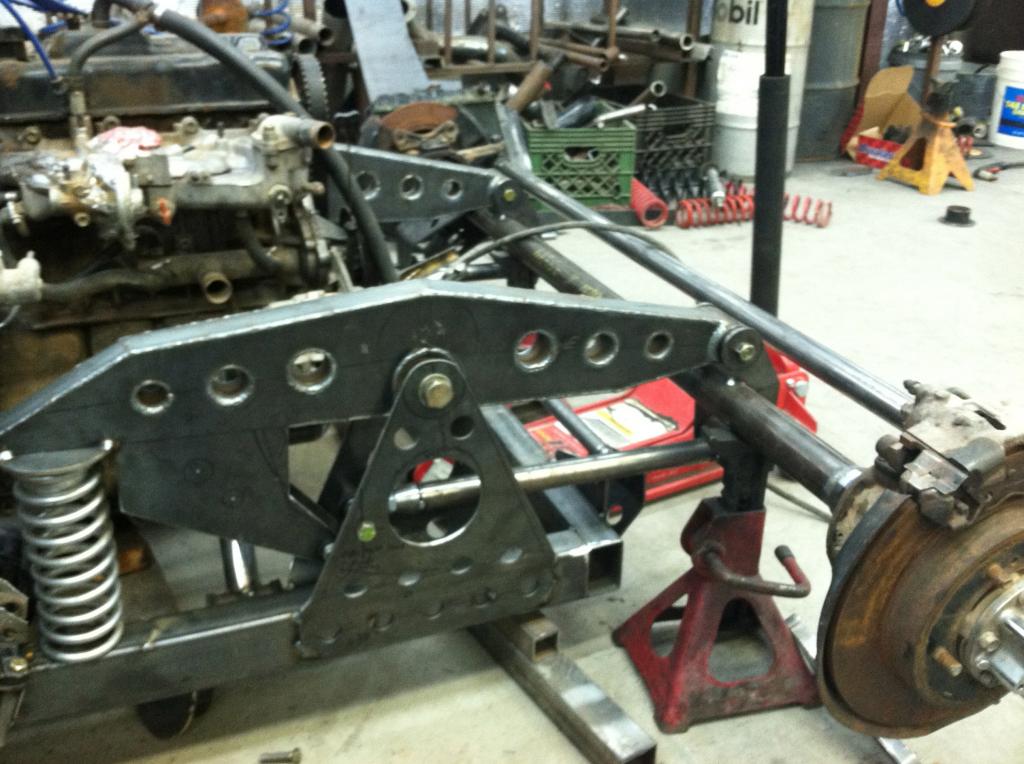
Oh yeah, I found some pictures of my arch nemesis, and mortal enemy: Kamikaze.

Now, he doesn’t know he is my mortal enemy, and it does not take up much of his time, but he will rue the day! No. Probably not.

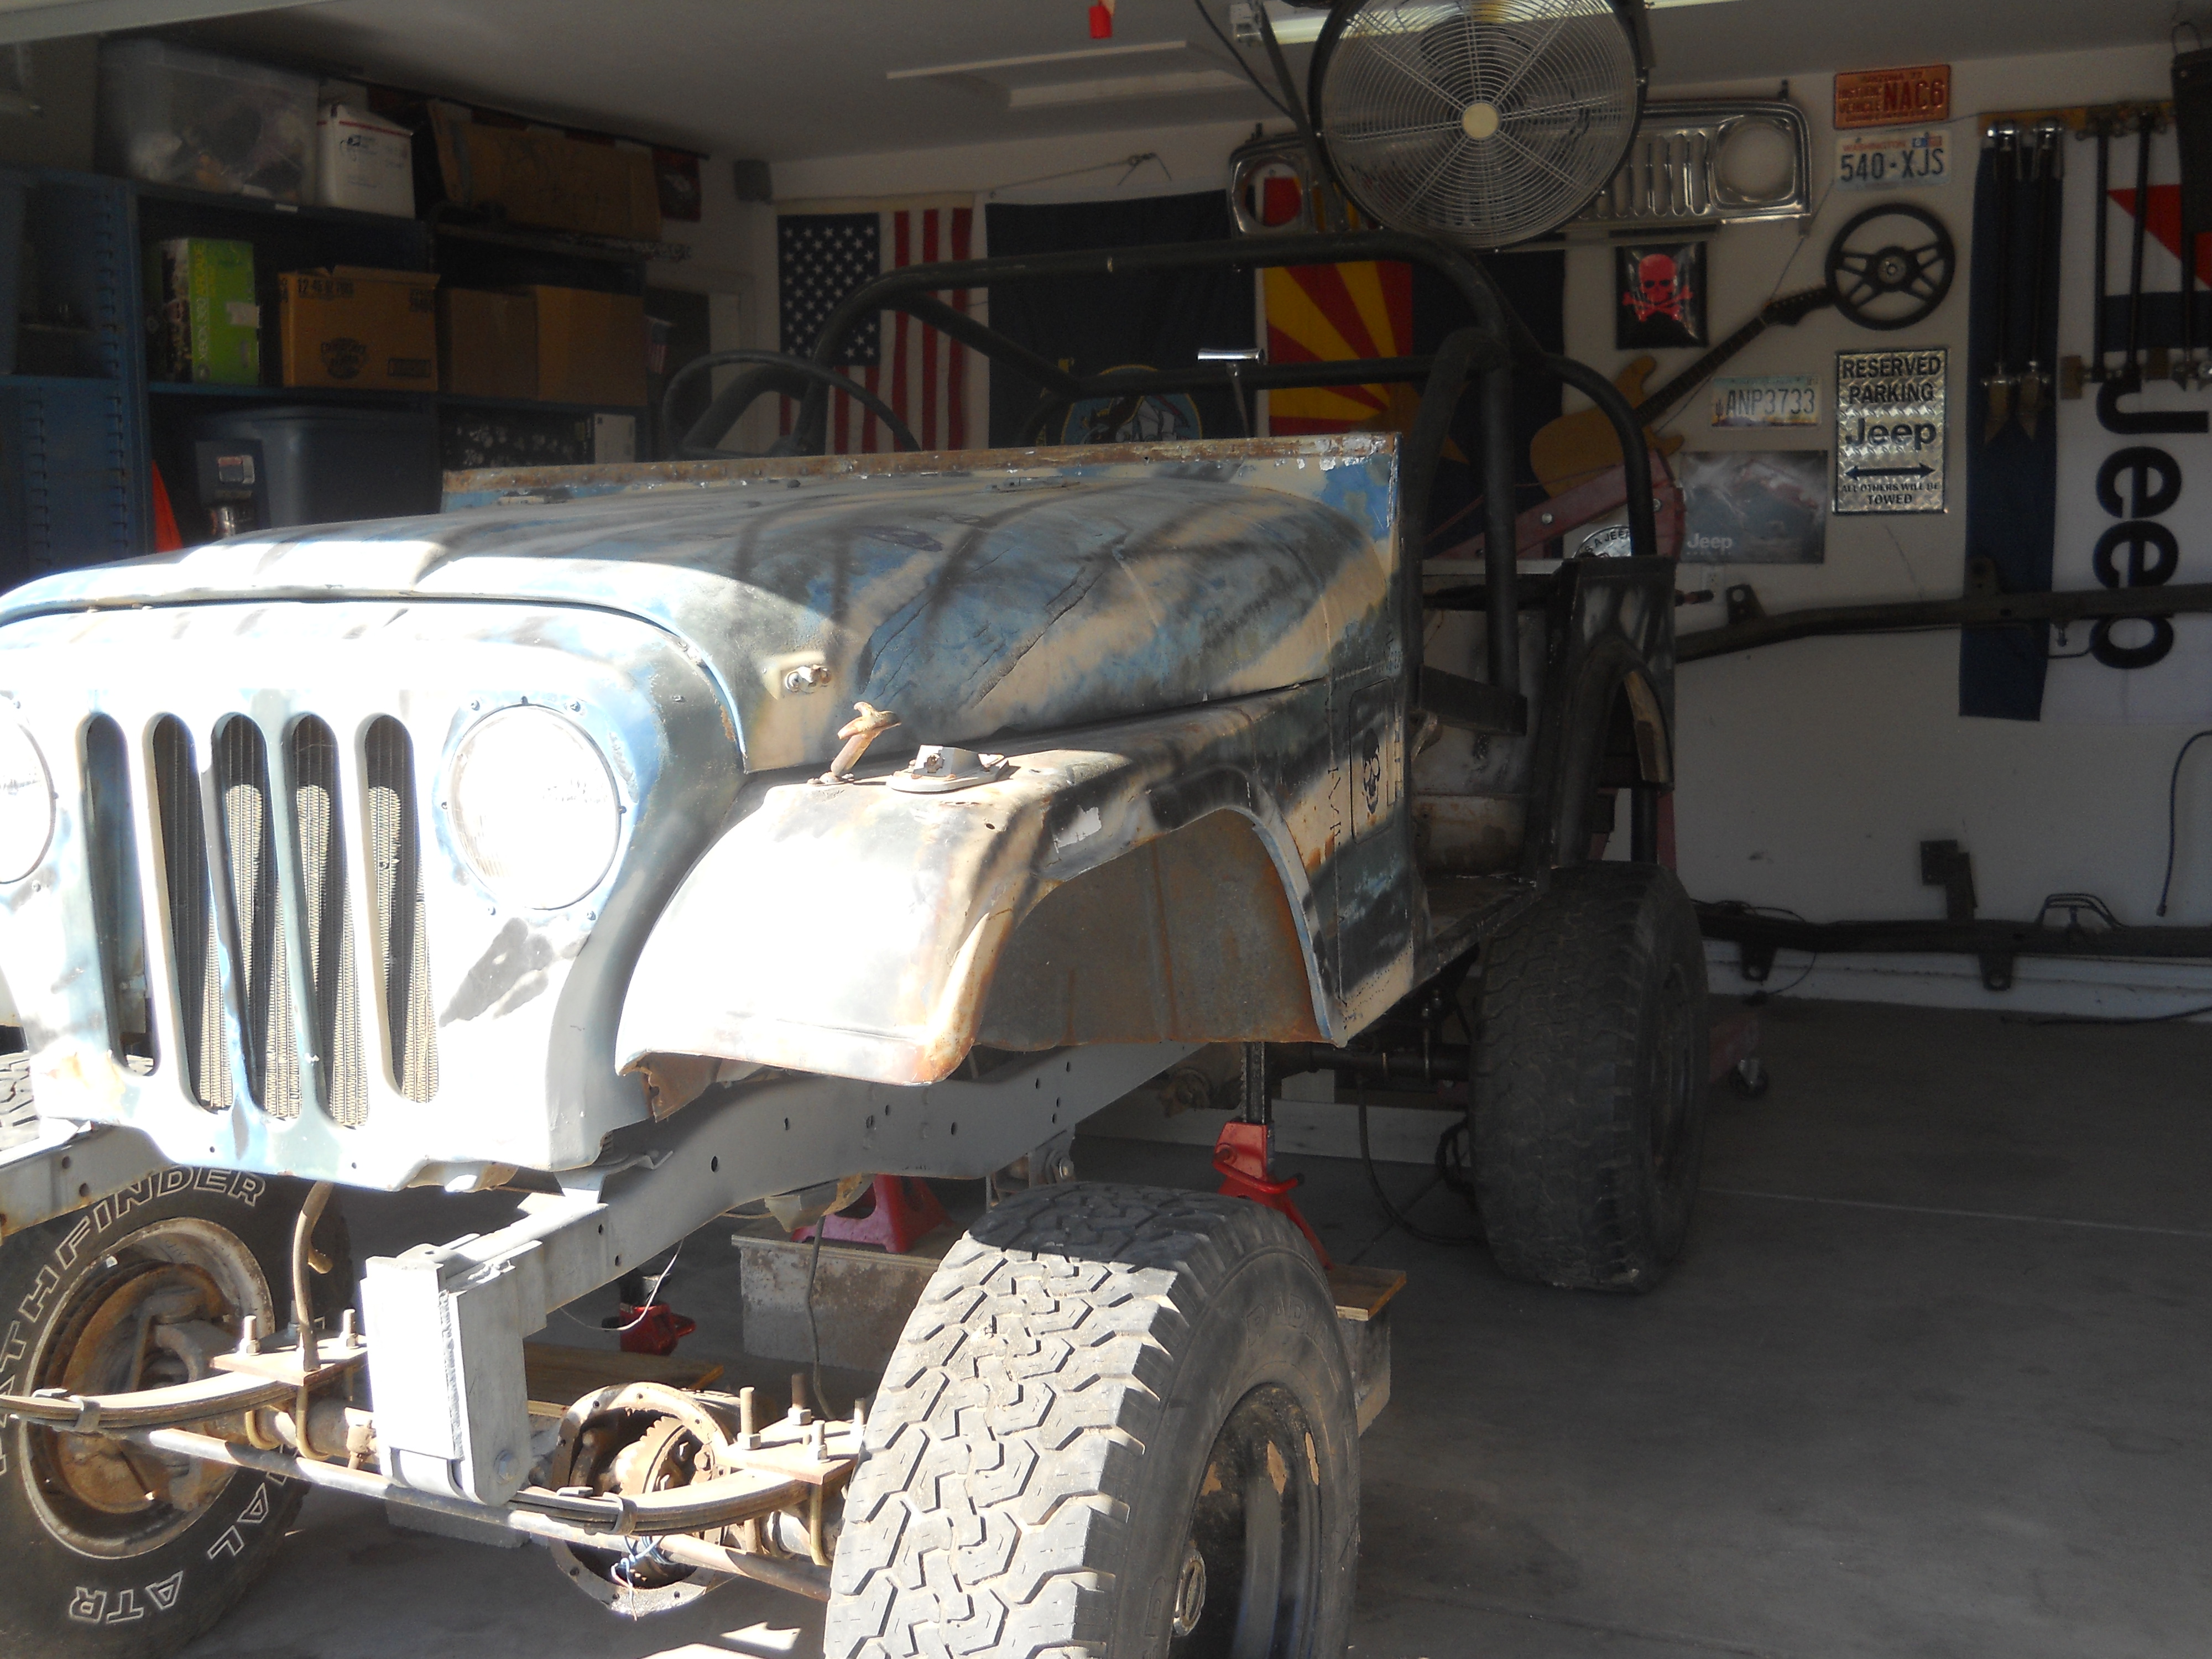
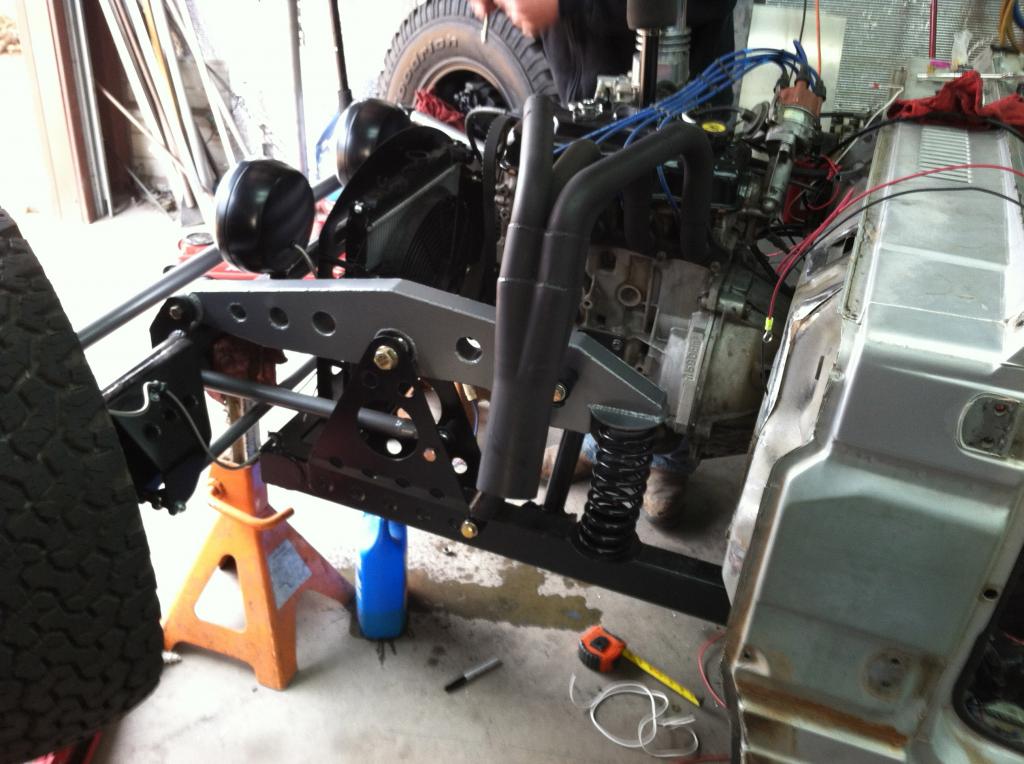
But, does this not look familiar? A right hand drive, open wheeled, flat rod style vehicle with no top… And it was built in my own back yard!! Well, not literally, in my own back yard. This guy has his shop in Mesa, AZ. But that is only 20 minutes away.

Is it not funny? Life? I mean, here I am, a guy trying to “do his own thing”, and I take up an obscure project: a 1972 AM General Dispatcher Jeep – a right hand drive mail delivery vehicle, and I plan for it to become a rat rod. Why did I choose rat rod (excuse me – flat rod)? For the simple fact that I did not want to become another 4WD DJ. And, here we are, someone beat me to the punch! A RHD flat rod… of sorts.

I went to do more research on this guy, and I have seen other pictures of him. I must say, I do admire the workmanship. Not too shabby!

Kamikaze - Front Suspension (1)Kamikaze - Front Suspension (3)Kamikaze - Transmission TunnelKamikaze - Rear Frame

So, now that I have an arch nemesis, what will I do? Get some ideas, and build my rig. Just like I would have, before I found out I had a mortal enemy.

After all, I did get the original idea, sparked from Randy Ellis, in Phoenix (he made the green Army flat rod I showed you pictures of in Genesis – The Revelation). Besides, isn’t that what this whole hot rod / rat rod / custom / kustom scene is all about? Do what you like, and who cares what others think. Hopefully, your build will inspire others to come up with their own creative ideas, thus continuing the cycle, and keeping the spirit of building rods alive!

I mean, as long as you aren’t just finding old iron, and rolling it into a shop to have them do all of your work, from conception to completion as you write checks and sit back, saying “Look at what I have done!” I think, so what? Fuck ’em. Who cares what your rod looks like. Do you love it? That is all that matters. Do what makes you happy. Show what inspires you!

You want to put a V-Tech Honda motor into a ’32 Ford, do it! I don’t agree with it, but I have seen it done. I believe that it is the idea, others will interpret it differently, just ensure it brings you joy. Whether it be hot, rat, volks, flat, or traditional – build what makes you happy, and if someone else likes it, great. If not, oh well, I am sure there is a Porsche dealership nearby that they may drool all over the new Panamera Z. (Really guys? A four door Porsche? I am sure that Ferdinand Porsche is rolling in his grave right now. Or maybe not… what the hell do I know. I’m building a right hand steering, two-wheel drive, diesel powered, lowered Jeep on 33 inch tires!)

But, back to that point of, do it for you. Do not worry about what the other Joe is going to think about your build. After all, do you think he cares about your opinion?

And remember this: Just because you paint your car, truck, or van flat black… That does not make it a rat rod. When a guy spends $150k to have an old car “built”, and it happens to have a patina finish… It is not a rat rod!

In the most purest of terms, “Rat Rod” is simply “function before beauty“, meaning, take what you have, and make it work. You still need to actually put forth an effort, because life is not “Build a Car Reality Series“. You do not get paid commission, and there is no reason to put out shit, just in the name of “Rat”.


*Disclaimer: Kamikaze is not really my arch nemesis, I do not even know the guy, nor does he know me. I was looking for ideas on what to do with FrankenJeep, when I came across this. The fact that his rod is an open wheeled, roadster, with right hand drive is purely coincidental. The fact that it just so happens to be a Suzuki Samurai, is just mean irony. I hold no ill feelings toward this rod or its builder, and I hope to get FrankenJeep done in a fashionable time, enough to meet him in person. It would be fun to have these two vehicles side by side – mortal enemies, Jeep and Samurai.


And where have I been spending my time lately? Well, to speak the truth – a lot at work, a little bit at the house, and even less in the garage. If you didn’t know, I work on an oil rig, and I am gone for nearly a month at a time. So it is not like I get paid to work on this thing all day every day. But, that does not mean I have completely shirked my duties in the build. I got something done! Well, sort of… I got something mostly done.

So, I haven’t gotten as far on the build as I wanted to. What is it that I did get accomplished, you may ask?

I got most of the frame welded up. Earlier, I showed you my monster C-notches. Well, I got them (mostly) installed, I need to weld three more plates onto it, and I will be good to start work on the suspension. Tony and I had to do a lot of framework, in order to get these things to sit properly.

See?

IMG_1041[1]IMG_1040[1]IMG_1039[1]IMG_1038[1]

These are not “before and after” pictures, they are left side/right side pictures. There was a crossmember we had to cut out, and there was a lot of boxing in of the frame that needed to be done. But after all that work, we were able to place the notches, and get them ready for final install.

1402292039147[1]1402292038560[1]


If you remember correctly, my C-notches came to me as multiple pieces of CNC cut metal – (4) “C” pieces, (4) outer strips, (4) inner strips, (2) uppers and (2) lowers.

The idea behind this is to place the “C” where you want it on the frame, and tack weld it there. Place another “C” in the exact same spot, on the other side of that frame rail, and tack it there. When the placement is good, simply weld it all up, boxing the outer part of your “C” with the strips, before cutting the frame and boxing the inner part. Vi-ola! An 18″ C-notch.

MORE PICTURES!!

1402292038778[1]1402292038219[1]

Tony got to cut the frame portions out of the notches, seeing as I had just done all of the welding. I didn’t want him to feel left out.

IMG_1043[1]

Now, I have never called myself a welder, and I know that there are many a man (and woman too) that could weld better than that, but… The name of the project is “FRANKENJEEP”, and it is a rat rod! It is my first real build, and I am allowed a little bit of leeway here. As long as it is functional, and safe… I am not too worried about how it looks.

Plus, you don’t get to do things this when you are worried about pretty…

1402292037434[1]

Yup. I gave it a tramp stamp. Actually, Jaiden gave it a tramp stamp, that is his handwriting. Some time ago, when he was first learning to write, I had him write out his ABC’s with a Sharpie. I had him write them three times each, upper and lower case. I then scanned them into the computer, jumped on to Photoshop and took the ones I liked the best and created the word “FrankenJeep”. Afterwards, I took a yellow crayon and “traced” out the letters onto my bumper before following them with the MIG gun.

That is the gist of what I have accomplished since we last spoke. I know it is not the “final product” you were all waiting for, but I have also been trying to get some other things in order. For example, my neighbor Chris, has come up with an ingenious idea of a rolling bar – a 1969 Chevy flatbed pickup truck, with the back of it converted into a bar. It goes by many names, the Buccaneer’s Bowtie, and the Patina Cantina… but mostly, it goes ambiguously as – The Pirate Ship. I am to be doing the welding on it, but that is not my story to tell. *I will try and get some spy photos for you though.

We also had to repair an A/C condenser problem (on a Honda, ugh). We did a brake job on Tony’s Mazda, and I have done some minor upgrades to the little Neon. Sorry to disappoint, but the Neon is my commuter car, and I cannot afford to take it out of commission just to go all Tim Allen on it. As much as I might like to… but hey, I get a solid 35mpg out of it, there is really no reason to change any part of that. I did get some new (to me) headlights for it. I scored a pair of projector headlights for $60 at the local yard. Pretty stoked about that! Plus, they came with smoked turn signals. That is, like 5hp each… or something.

AND… the teenager just came back from Washington! That is cool, but, the last year of “I don’t know where this should go, so let’s put it in his room” went to the garage. That means I get to clean up the garage… again.

I have also been doing a lot of hunting for ideas, and trying to figure out some problems, before they give me too much grief. I have been sourcing new parts and other potential parts to see what I can get, and what I can do for this… A lot of homework, really.

An example of potential problems? I found out that my tub dimensions are 60″ outside width. My AMC 20 axle, lug to lug, is 60″. At first, I thought that would work out, but then I realized that doesn’t work at all. Not without one or two inch spacers, and a wicked backspacing, like zero. That is something I want to avoid. Stupid looking, custom wheels. [|>–o–<|] (*my poor attempt to illustrate improper backspacing on an axle)

So back to the drawing board, and I find that a Chevy full size axle is 68″. That gives me four inches on each side of the tub. Guess what? My neighbor just happens to be a Chevy guy with a line on these. Done and done. He also informed me about ensuring that my drive height does not make my driveline perfectly parallel with the differential. I never thought about it before, but I guess that the needle bearings are not meant to free float, and so you need to pitch your diff up or down just a bit to keep that from happening.

As you can see, even though I may not be in the garage working on this thing, I am always working on it. So, until next time…


——————————–
THE IDEA
——————————–
So, I bought this little DJ-5B for a Jeep project in 2012.
 DSCN1326 DSCN1327

Originally, I was going to turn it into a 4×4. Although I have only seen a few guys actually convert these little DJs over to four wheel drive, most of the time very little is left of them for wheeling (maybe the grille, and the fact that they are right hand drive). [To the credit of the guys at Petersen’s 4Wheel & Off Road, they built a very capable 4×4 DJ-5, but it was more of a work horse than an off road machine.] And then there was the fact that there are three other DJs in Arizona that have been converted over to 4WD.

——————————–
THE REVELATION
——————————–

After I thought about the technicalities of a (cheap) four wheel drive, manual steering setup for this right hand drive Jeep, I figured that maybe I was about to start another project doomed for the chop shop. [After all, after owning it for two years, the only thing I had done to it thus far, was have it moved from Glendale to Queen Creek, from Queen Creek to San Tan Valley, and from my old house to my new house (next door). Although, I suppose if you look at the distances, and take that into account, you can see that I actually did make progress with each move, but I only brought it closer. Now it was time to really work on it.] And then I decided to go the way of the flat rod, except I know it can be done with much more… well, much more my style.

I caught wind of this thing called a Flat Rod, and I had to look more into it. I had seen a couple of them done and loved the idea. A flat fender Jeep, a hot rod… a flat rod. It is a Jeep… a hot rod… a custom build… What else could I do with this? My mind started racing, and the idea floodgates were opened wide.

I started looking on the web for ideas from pictures of built flat rods, so I could see how others had done it before me. As I have seen a few of these done, I have only found two done that were built with any style. These are some pictures of the two Jeeps that helped give me the idea.

A shop in Texas built this:


And a shop in Phoenix built this one, the one that got my attention:


——————————–

THE BEGINNING
——————————–
The little Jeep started life as a DJ-5B, a postal Jeep.
IMG_0628
Of course, life was simpler back then, going house to house, on its little postal route. Then, funny as life is, it ends up in my garage, destined to become something… well, all I can say is it won’t be the same little postal Jeep it once was.
——————————–
THE LOOK
——————————–
This is an idea of what I will be going for; except, I believe that it can be executed much better.
IMG_0614
I want to combine this idea here, of the postal hot rod, with the idea of the flat rod, and build something a little different. I want to use a Willys pick up cab roof, grille and (possibly) hood, instead of the DJ-5 metal.
IMG_0612 IMG_0613
The cowl is the same shape and size, so they should carry over quite easily. I will be chopping the roof of the cab, before grafting it onto the DJ.  As far as the hood goes, if it needs to be cut in order to fit the engine, it will just be skipped, but I have ideas for either with or without it.
——————————–
THE POWER
——————————–
Speaking of the engine, I have located a line on a group of 4BT diesel engines, here in Phoenix, and the idea is to make this into a diesel rod. The 4BT is practically cast from the same block as what was found in the first generation Dodge/Cummins, 6BT diesel trucks (1989-1998), less two cylinders.
Engines-Cummins-4BT-101673
——————————–
THE MUSE
——————————–
The diesel rat idea came from this beast.
8fd5455d03f14c19cbbbdadd77a9c4cf

http://www.youtube.com/watch?v=aMevqNjVV3M

Might I suggest you watch the whole two minutes, the ending is pretty good!

In case you were wondering, that is a 1928 Dodge Brothers Sedan with a 6BT, Cummins twin-turbo diesel. It puts out 1270 lbs-ft of torque, 693 rwhp, and weighs in at 3800 lbs. He runs 11.69 at 118 mph in the quarter mile, and it also consistently gets 23-25 mpg.

——————————–
THE REALITY
——————————–
Now, I know, I am notorious for talking about projects and not following through. I am turning over a new leaf here, and have decided that if I can’t get something, anything, done to the project while I am home on my off time, then it is time to reassess the situation, and maybe I should not have a project right now.
——————————–
THE PROOF
——————————–
My last time in, my son Jaiden helped me and my buddy, Tony, take off the tub and strip it all down to frame. Jaiden got to remove the dashboard and the pedals, all by himself.
This is what we got done that day.
IMG_0753
My goal this time in, was to clean the frame and prepare it for the drop channel to be welded. Tony came back over, and we re-rearranged the garage (again) and stripped the frame, then set it at ride height… 6″ above ground.
*EDIT: After I talked it over with multiple people, I found that my ride height will be more along the lines of 1-2″ above ground. It will still park frame.
——————————–
THE NEXT STEP
——————————–
Now that we have established ride height, it is necessary to fabricate a front end suspension for the chassis and to C-notch the rear end for axle clearance. I will be using the AMC 20 axle that came from my ’84 Wagoneer as a rear axle, and will be driving 33″ tires, front and rear.
. . .
Ultimately, I would like this to park and lay frame, but I find me going Jiminy Cricket on myself, and I have been trying to keep the scope creep to a minimum. This means that I have an original idea, and I need to stick to it. I need to keep from adding to it, and complicating it more than I already have. So, I may find that ride height, and park height are the same. We will see how that all pans out.
——————————–
THE VERDICT
——————————–
I had to check the frame true.
 IMG_0989 IMG_0990
Looks like the bubble is happy!