When I found out my quarters were pot metal, I was pretty upset, I wanted to have a clean chop. The cut was clean, but seeing as I did not have a TIG welder, I could not have the clean look I was after, meaning I could not weld the seam. I tried to cover it with a Weld Stik, which is like a putty compound that is supposedly able to work as a weld adhesive.
That did not really work well, so I tried to paint over it with Flex Seal. I had really good luck with the Flex Seal when I used it on the J20 dash. This time was much different, I found out that stuff does not work very well when it is used vertically as it likes to drip. Actually it ran as fast as I laid it down, it was like trying to paint with ice cream… in the summer. It did not work well at all.


Switching gears – instead of trying to fix it, just replace it. Sounds good, right? Right. That is exactly what I did, I took the 16 gauge steel I had lying around the garage and made quarter panels from it. The first one was a total disaster. I lined up the edge, drilled my holes and then riveted each one by hand with a ¼” rivet. I proceeded to make my bend around the corner and quickly realized the metal was not bending cleanly as I wanted it to, but it was instead creasing.

Not good. Not good at all. I decided that maybe this was a two man job, so I briefed Tony the next weekend and we set to create a quarter panel.
Of course, during this build, I have made it a point to try and work with something while only using half of the tools needed for the job. Haha. At least that is the way it seems. Just remember that I am but a man with an idea, trying to seek project fruition in a 200 square foot garage that happens to be located in a Home Owners Association and I am on a limited budget. [Okay, full disclosure – the “limited” budget is widely due to my inability to focus on a single project. I have this one, the J20 build (which is another reason I have not written here lately), the Camry engine overhaul, the Grand Prix project, the Baja Comanche project, etc… etc… etc…]
THE QUARTER PANELS?!?
Yes, the quarter panels. Sorry. So I have this 16ga steel in the garage that used to be shelves. It is not the best steel I have come across, but it is readily available to me, so I made measurements, checked them, second checked them and laid out templates on the sheet. Then I cut the panel out and drilled my first hole. I measured out all of my holes and drilled them, installing ¼” rivets into each hole via manual rivet gun. As I was making my way around the corner, it started creasing and that is when I got Tony involved. I figured we needed to heat up the metal and make it more pliable so it will bend better. The proper tool for this is NOT a propane torch. Then, once the metal is hot enough, you want to have a dolly to strike against and move the metal. A proper dolly is NOT made from a broken adjustable wrench and a 3”x3” square piece of ⅛” thick steel. And you want to use a hefty hammer for striking your dolly to move the metal where you want it. The proper hammer is NOT an Estwing claw hammer.
Do you see what I am working with here?
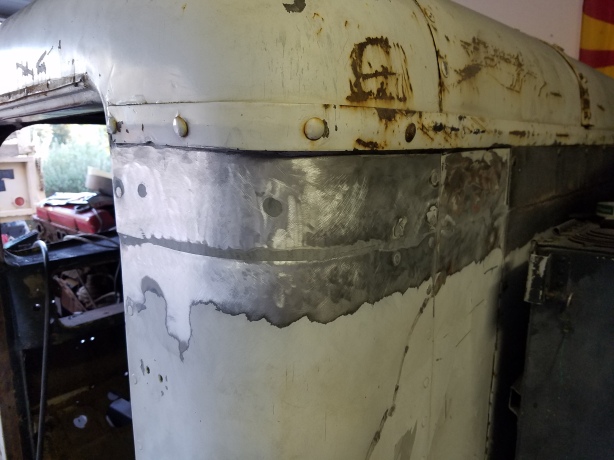
Anyhow, Tony and I went to heating and striking. Heating and Striking. Heating and … Oh no, the metal is on fire! Nope, false alarm. Only the paint was on fire. Heating and striking. Drilling and pop riveting. Drilling and pop riveting. Heating and strik… um, why do we have a bend in the middle of the metal going perpendicular to our projected shape? Ah crap! Okay… Now what? Relief cut! We will just use the cutting wheel to make a cut across the metal and the side should lay down like it is supposed to. I got my welder back up and running, ran a few beads across the relief cut and thought it was ugly, but functional. Whew!! That was quite the ordeal!


[I ended up going to work and coming back before we did the other side.]
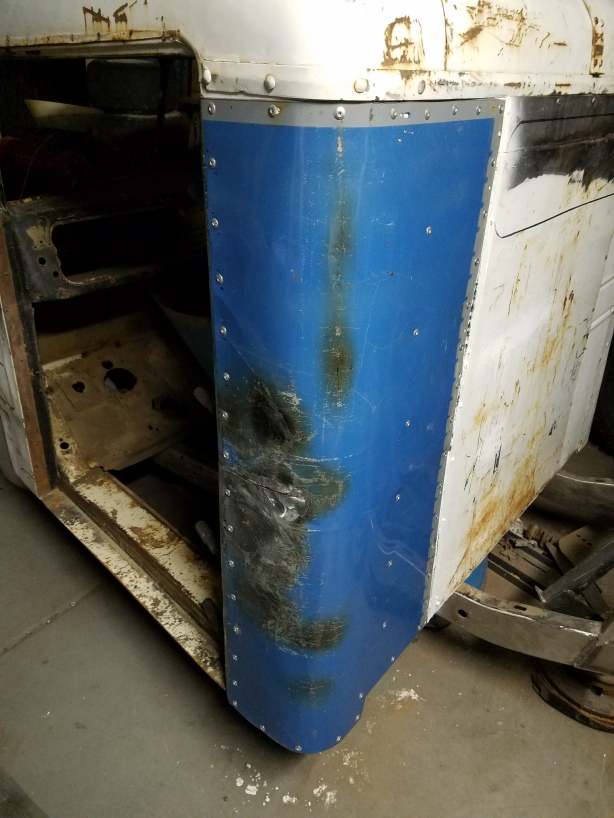
This time, we knew what had to happen. We measured, checked, checked again, laid it out and cut it from the sheet stock. We drilled the first hole, hand riveted the ¼” rivet and measured down to do it again. We got the inside line of rivets set and got prepared for the circus we knew that was about to commence. We measured, marked and drilled out, hand riveted and did it again. And again. And again. We did the bottom side the same way. Wait. What?? No heating and striking? Nope. This one laid out just perfectly, all the way to the end. So much that I almost ripped off the first one to do it again.


Hope you’re well Jon 🙂
John Mulry Owner and Marketing Maverick at Expect Success Academy Phone +353874168050
Email john@johnmulry.com Website http://www.JohnMulry.com Author of. Your Elephant’s Under Threat, The Truth!, Direct Response, 7 Deadly Sins Crippling Your Business and Send in the Wolves. Find Out How John Can Help You Get More Customers, Referrals and Profits Free Case Study:How we boosted advertising response by 1500%
*Note* – I only check email twice a day between 12pm – 6pm so if you don’t hear back from me immediately, please be patient.
>
Yes sir, I am. There is much more story to tell and I will get more of it out soon. I apologize to you [my readers] for not being diligent about getting the writings on paper in a timely manner.